This buckwheat flour bread recipe is very easy to make. This recipe doesn’t use yeast, which means that theire is no kneading or bread proving involved, which means you can have your bread ready within an hour.
I have other bread recipes that don’t require kneading, such as wholemeal soda bread, rye bread or traditional soda bread without buttermilk, so it’s been really nice to experiment with another type of gluten free flour.
I’ve also recently made yeasted bread using the no-knead method, which was a lot of fun and certainly worth method to have in my repertoire.
Why make this recipe?
- Naturally gluten-free bread flour
- Great for Low FODMAP diet
- Quick to make – just mix and bake!

MORE BREAD RECIPES
- Black Russian Rye Bread >>
- Beer Bread >>
- Quick Sourdough Style Bread (without the sourdough starter) >>
Ingredients for gluten free buckwheat bread with seeds
Buckwheat flour
Buckwheat flour is naturally gluten free, but it might not always be labeled as such. It’s a type of flour that’s suitable for baking pizza bases, poured in breads (like this one), flat breads, healthy muffins, pancakes or tray bakes.
It’s not a particularly good flour to use for breads that are raised with yeast (I usually add a regular flour to the buckwheat when I make regular breads.)
Buckwheat flour has quite a strong flavour, so if you prefer you can mix it with other gluten free flours or low gluten flours, such as spelt, rye or lupin flour.
If you want your bread to be a little bit lighter, you can swap about 50 grams (about 5 tablespoons) of buckwheat flour for potato flour.
If you want to keep your bread Low FODMAP, use only buckwheat flour with a little bit of spelt, potato or rice flour, but definitely not lupin, soya or rye flour.
Seeds
I wanted to add a bit of a bite to this bread, so I’ve use a handful of mixed seeds.
I have a large jar with mixed seeds, which I keep replenishing with new ones as I buy them, but most of the time it includes sesame, pumpkin, sunflower, poppy and linseeds.
I have tried my best to measure out the amount of seeds I add in, but if I’m being honest, it’s always a ‘handful’ or whatever I have available.
You can leave the seeds out, if you prefer (and don’t need to adjust the recipe in any other way).
Maple syrup
You can use any type of sugar you like or leave it out all together. I’ve used maple syrup because it’s Low FODMAP and it colours the bread really nicely.
Xanthan gum
This is quite an important ingredient when baking with gluten free flour, as it replaces the gluten and helps to bind the flour together.
Xanthan gum is essential for ensuring the flour has a stretch, doesn’t crumble, stays together and doesn’t fall apart.
A few baking tips for making your buckwheat bread
Mixing
The only advice I want to give you here is mix the bread dough well, but don’t over mix it.
You certainly don’t need a mixer for this bread, just use a wooden spoon and a large bowl to mix everything in.
There is no need to knead this bread and no need to prove it either. You literally just mix everything together and pour it into your prepared tin.
The bread mixture will resemble a very sloppy porridge, but that’s exactly what it needs to look like. The excess water will evaporate during the baking, so please don’t worry it won’t be soggy at all.
Baking Tins
I usually use a 2 pound loaf tin, either cake tin or bread baking tin. You have to use baking tin as this bread mixture is too runny to hold it’s own structure. It’s best to line your baking tins with greaseproof baking paper as it will be easier to take the bread out and the baked bread won’t stick to your tins.
Baking
To check that your bread is done, use a wooden skewer. If it comes out clean and not wet, your bread is done.
How to bake buckwheat bread
Measure out all the dry ingredients first – the buckwheat flour, salt, baking powder, baking soda and seeds. Put all the ingredients into a bowl and mix thoroughly with a wooden spoon.
Add the water mixed with the maple syrup and mix together. It will be a very wet – porridge like – consistency.
Line a 2 pound loaf tin with a baking parchment.
Pour the bread mixture in and sprinkle some more seeds on the top.
Bake in a pre-heated oven for about 50 mins (about 180C or 350C which is a much lower bread oven temperature than for yeasted bread) or until a toothpick or a wooden skewer comes out clean. Check your bread after about 40 minutes, just in case if your oven bakes a little faster.
Cool in a baking tin for about 5 minutes and then lift by the greaseproof paper and leave to cool down properly on a wire cooling rack.
How to store your buckwheat bread
Once your bread has cooled down it’s ready to be served & tasted. If you want to keep the bread for longer period of time (up to 3 months), you can freeze the bread, once it has cooled down.
I normally store my bread in a loose paper bag inside a bread tin. This way the bread is fine for 3-4 days and often for a whole week. But, if I’m honest, it never lasts that long!
There are plenty of other ways you can keep your bread from going mouldy, but I usually keep 1/2 of the bread for immediate use and freeze 1/2 for later.
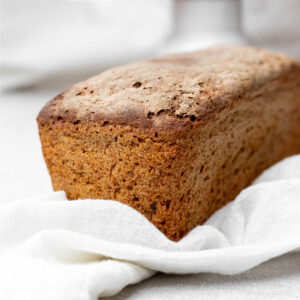
Buckwheat bread with seeds (no knead)
Ingredients
- 450 grams buckwheat flour
- 1 1/2 teaspoon salt adjust to your preference
- 1 teaspoon maple syrup honey, agave or dark sugar
- 1 teaspoon baking powder
- 1 teaspoon xanthan gum
- 1 teaspoon baking soda
- 50 grams mixed seeds
- 450 ml warm water
Instructions
- Measure out all the dry ingredients first – the buckwheat flour, salt, baking powder, baking soda and seeds. Put all the ingredients into a bowl and mix thoroughly with a wooden spoon.
- Add the water mixed with the maple syrup and mix together. It will be a very wet – porridge like – consistency.
- Line a 2 pound loaf tin with a baking parchment.
- Pour the bread mixture in and sprinkle some more seeds on the top.
- Bake in a pre-heated oven for about 50 mins (about 180C) or until a toothpick or a wooden skewer comes out clean. Check your bread after about 40 minutes, just in case if your oven bakes a little faster.
- Cool in a baking tin for about 5 minutes and then lift by the greaseproof paper and leave to cool down properly on a wire cooling rack.
Nutrition
This blog post was originally written on 22 April 2021 and last updated on 12 November 2022


Leave a Reply