Preserving (canning) pumpkin cubes
An effective way to keep your pumpkin harvest for the winter by pressure cooker canning. Step by step guide to how to preserve (or can) pumpkins at home. Canned pumpkin can be made into soups, puddings and cakes or a pumpkin butter.
Equipment
- Pressure Cooker
- Large Jars (sterilised)
Ingredients
- 1-2 pumpkins whatever you have
- water enough water to cover the pumpkin cubes in the jars and to par-boil the pumpkin cubes
Instructions
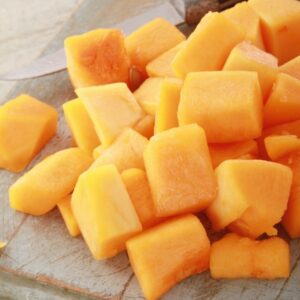
- Cut up the pumpkin - first into half, then across into 2 cm (I inch) slices.
- Cut off the thick skin from each slice and remove the seeds and the stringy middle bits.
- Cut up the slices into 2 cm cubes.
- In a large pan boil water and add all the cut up pumpkin cubes. Par-boil for 3 minutes to soften the pumpkin (but not to cook them or make them mushy)
- Remove the pumpkin cubes from the hot water and place to sterilised jars, leaving about 1.5 cm gap from the top. Pack the cubes in tightly, but not squash inside.
- Pour the water you've previously used for blanching the pumpkin cubes over the cubes and leave about 1 cm from the top. Make sure that all pumpkin cubes are covered with water - if not remove some, so that the jar is not overfilled. The water needs to be higher than the level of the pumpkin cubes and then you still need a bit of space between the water level and the lid level.
- Shake & tap the jam jars a little to make sure you get rid of any air bubbles.
- Add the lids on top of your jars and make sure they are tight.
- Refer to your pressure cooker instructions on how long you need to keep your jars in. This varies from make to make and it also depends on the size of your jars.
- As a guide, you'll need about 60 minutes for 0.5 lt jars
- Once your jars are ready, leave them to cool down slowly in the pressure cooker (you can open it now)
- Remove the jars and keep on the work counter until completely cold.
- If canned correctly, your pumpkin jars should be fine for 2 years, but I normally don't keep them for more than 1 year (as we eat them well before than)
Tried this recipe?Let us know how it was!