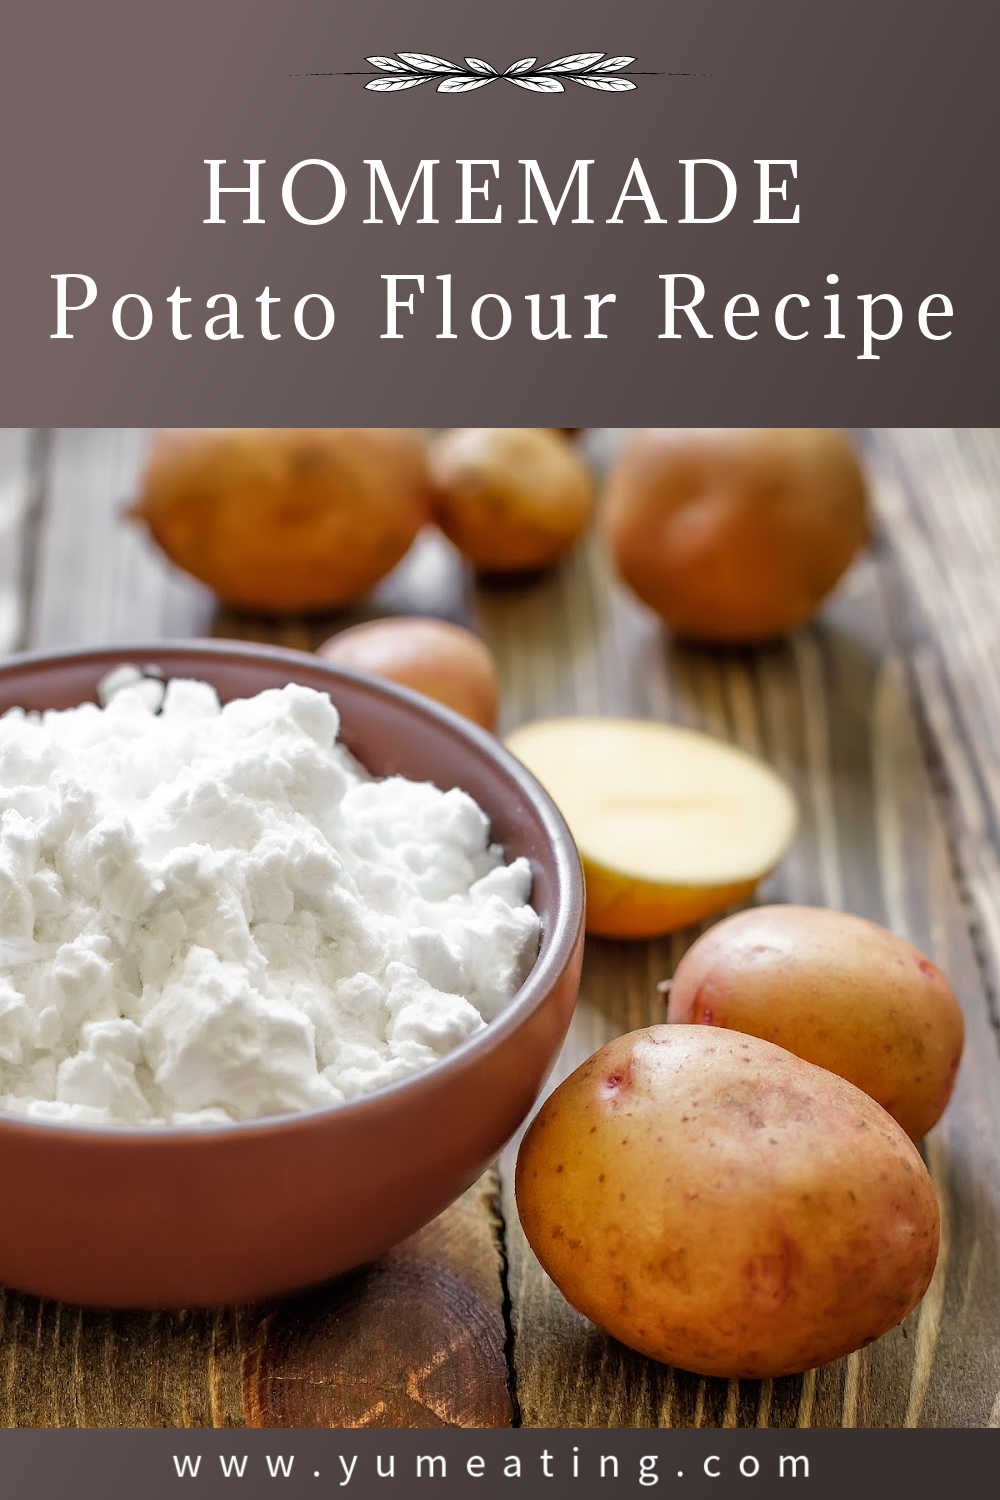
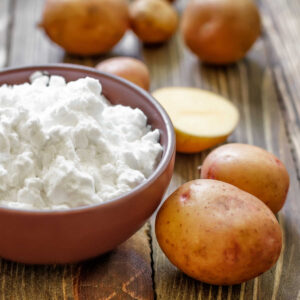
Easy way to make homemade flour from potatoes, suitable for gluten-free baking and cooking. Suitable for any kind of potatoes and made without complicated equipment from mashed or fresh potatoes.
I’ve recently started to experiment with gluten-free flours and flours that are easier to digest, including potato flour.
The problem is that the shop-bought potato flours could be a bit pricey and also seems to have a fairly short shelf life. Which is why I wanted to learn how to make potato flour at home.
In today’s blog post you can find all my tips on making your own potato flour at home without complicated (or expensive) equipment.
Why make flour potato at home?
Making potato flour at home is actually not that difficult. It not only saves you money, but you can also make the only amount you need without having any flour going off.
It’s a great money saving project and you can easily turn your leftover mashed potatoes or boiled potatoes into potato flour.
LIKE THIS RECIPE? PIN IT TO KEEP IT FOR LATER
MORE COOKING TIPS
- How to substitute parsnip in cooking >>
- Tips on drying herbs >>
- How to stop coconut oil from going bad >>
- Tips for brewing tea >>
Two main different ways of making potato flour at home
To make things a little easier, I’ve given you two options to make your potato flour at home.
Option 1 – Making potato flour from fresh potatoes
Option 2 – Making potato flour from mashed potatoes
The best way to decide which one to choose should be probably based on what food processing equipment you have.
You will need to process the dried potatoes in a grinder, food processor or a blender. If you don’t have any of these, you can still make potato flour at home, but I’d choose to start with mashed potatoes and then mill them or grind them with a rolling pin (if you don’t have anything else to process the potatoes with).
If you choose the first method of drying the fresh potatoes first, you need to have a good food processor.
Why use potato flour in baking?
Potato flour gives any bake a lighter texture, whether it’s bread, cake or biscuits.
You can swap part of regular gluten flour with potato flour (or potato starch) to give your yeasted bread a higher rise and lighter crumb.
Potato flour, similarly to lupin flour, is also naturally gluten free, which means you can safely use it in gluten-free baking.
Making your own potato flour at home is also a good way of using up potatoes, instead of freezing them.
To make potato flour at home, we need to first dry the potatoes and then grind them.
What type of potatoes are best for making potato flour at home
You can use any type of potatoes, but I normally go for large, starchy types of potatoes.
Not only that they are easier to peel and slice, but they also have more starch than new or baby potatoes.
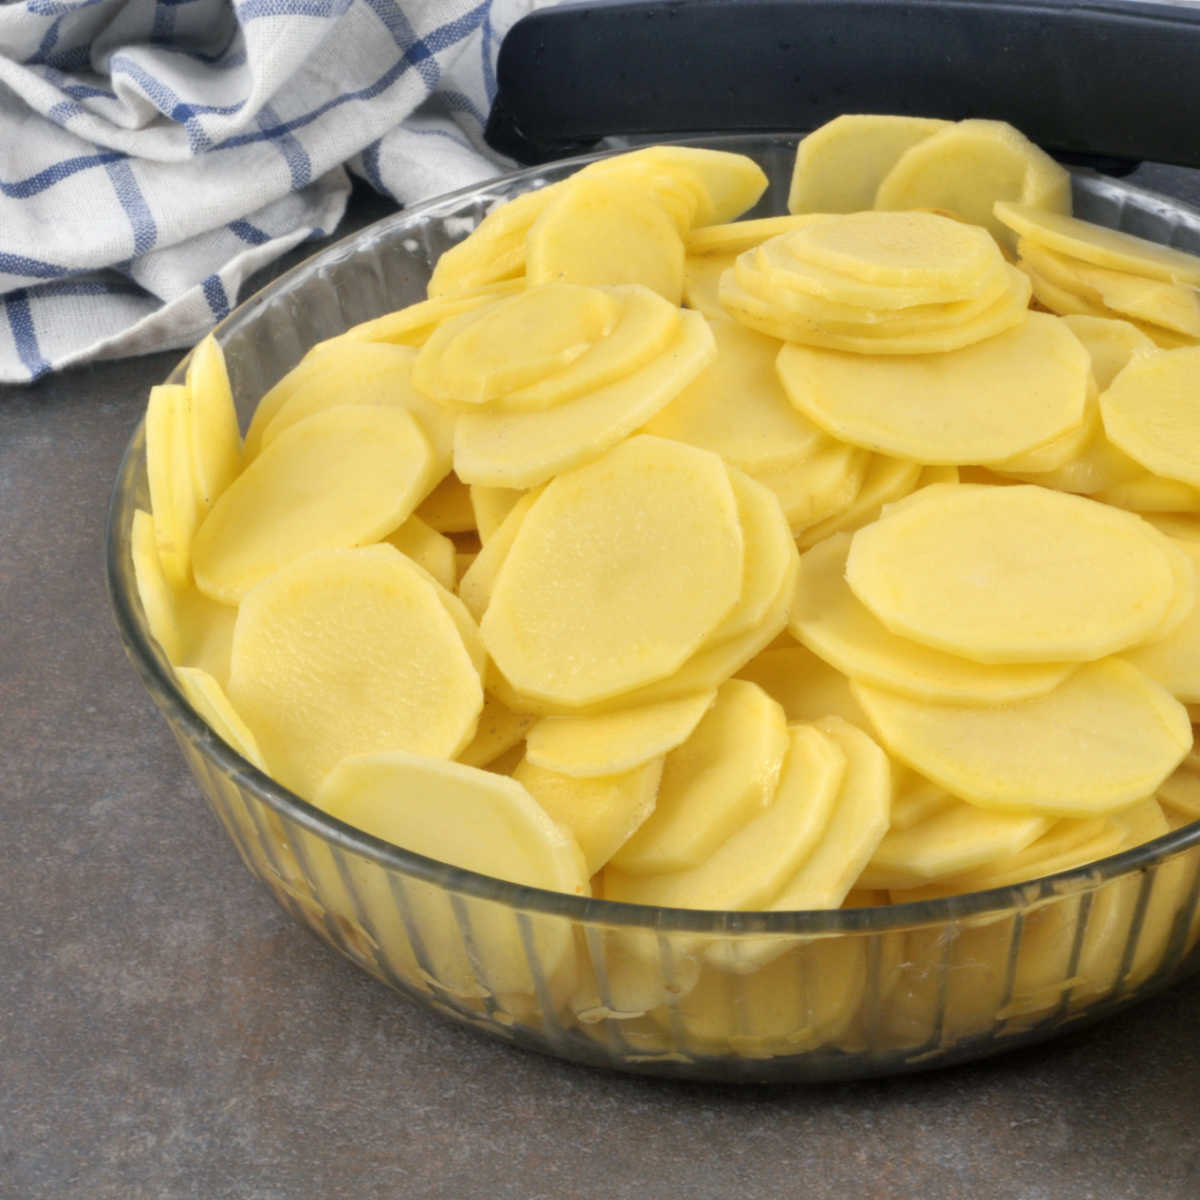
Preparing your potatoes
Wash the potatoes properly under water using a potato brush or scrub them with a sponge.
Next, slice the potatoes as thinly as you possibly can, much thinner than when you are making au gratin potatoes.
The thinner they are the quicker they will try. You can just use a sharp knife for this, potato peeler (if it’s big enough) or mandoline slicer or other food processors. well and peel the outer skin.
Next step is to place the potato slices on a baking tray (or large tray) lined with a greaseproof paper.
When I first started to dry my fruit and vegetables I would use a newspaper, but I wouldn’t recommend doing this as you could get the newspaper ink or colour on your potatoes.
If you don’t have a greaseproof or baking parchment, don’t use any. I’d stay clear of using absorbable papers, unless you know the paper fibers won’t stick to the potatoes as they are drying.
At this stage, you can also par boil the potatoes to prevent them from browning. All you need to do is to bring a large saucepan to boil and boil the potatoes for 1-2 minutes, depending on how thinly you’ve sliced them.
You only want them to go through the boil, but not to actually boil them.
Next job is to work out how to dry your potatoes as quickly as you can.
How to dry your potatoes for homemade potato flour
Oven
This is not the most cost-effective way to dry your potatoes, but it works well if you combine it with other baking or cooking that you are already doing.
If you for example have your oven hot/warm from just finishing your food, you can easily put the trays with potatoes in and leave the oven switched on at about 125° F/52° C or the lowest setting.
Or leave the oven switched of and just add the baking trays in.
Depending on how thick your potatoes are, this method can take about 6-8 hrs.
If you need to leave your house or can’t watch the oven, it’s O.K to switch off the oven and leave the potatoes in and just switch it back on when you return.
You can just dry the potatoes in short burst of heat.
Dehydrator
If you have a dehydrator, then just place your potatoes in your dehydrator’s trays and follow your manufacturer’s instructions for temperature and the length of time it will take to dry your potatoes.
As a rule of thumb, I would usually set the temperature for 125° F/52° C and it takes about 8 to 10 hours to get the potatoes dry, depending on how thick they are.
Sun
If you have a safe part of the garden where you know no animal (like a cat or a dog) will come to visit, you can easily dry your potatoes on a direct sun.
Unlike drying herbs, you can place the baking trays with sliced potatoes directly on the sun.
The sun will quickly dry the potatoes, so make sure you check your potatoes slices at regular intervals – anything from 30-60 minute and turn them round.
To make them dry quicker, when turning them place them slightly off the spot they have been drying previously.
On a direct hot sun in the summer, this process should take about 4 hrs.
Hot room
This is very cost-effective way to dry your potatoes indoors as it doesn’t cost anything, but it’s also the longest way to dry your potatoes.
First of all find a spot in your house or a flat that’s naturally hot. It could be in the boiler room, next to the hot water tank, hot spot on the floor where you have the hot water pipe going under, a hot spot in the attic or a glass conservatory.
This method can take 3-4 days depending on the amount of sun/heat you have available. Make sure you turn your potatoes to help them to dry quicker.
Radiator
In the winter it might be better to dry your potatoes on radiators, especially if you already have the heating on.
Depending on how often (and for how long) you have your heating on, this method can take anything up to 2 days. Make sure you still turn your potatoes slices over, as this will speed up the drying process.
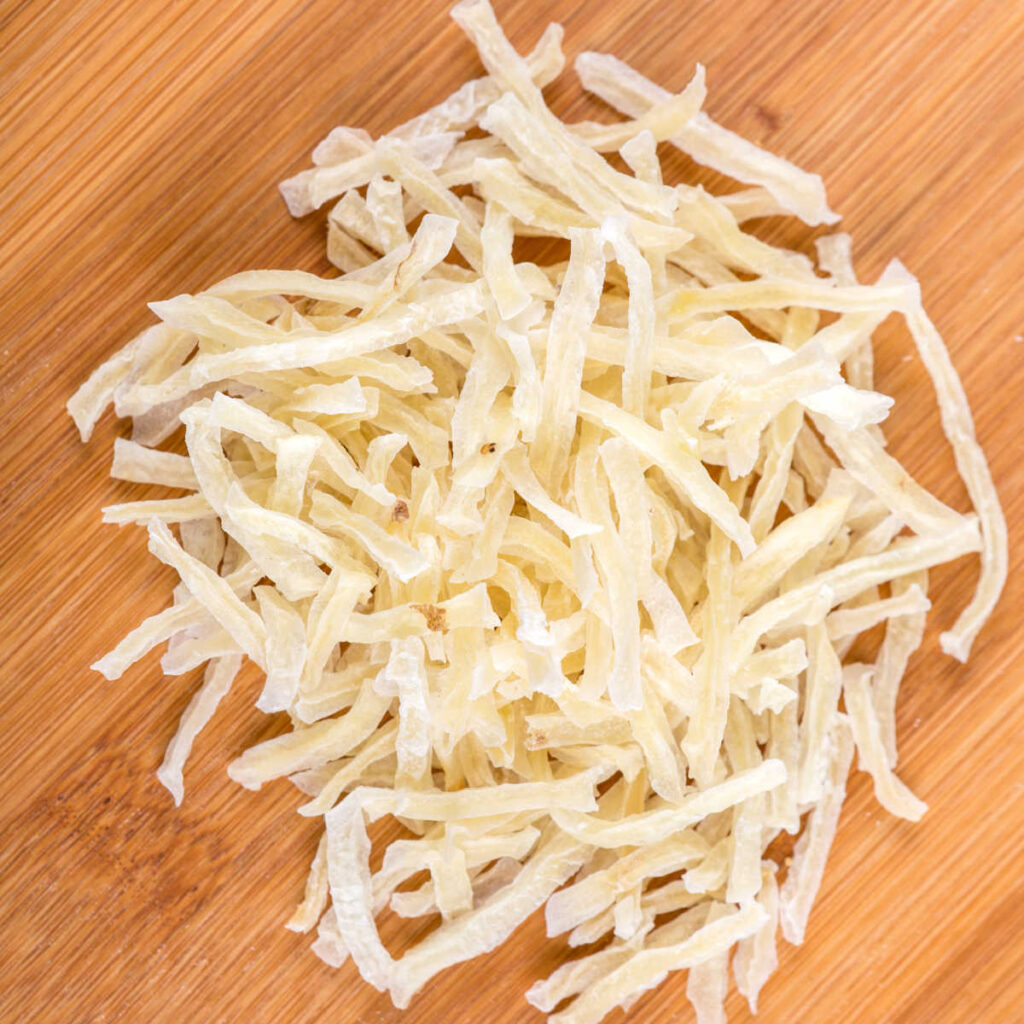
How to tell when your potato slices are dry
They will reduce in size and will be very light and dry to touch. When you try to crush them with your fingers, they should crumble.
If you are not too sure, whether they are ready or not, you could run a text batch through your grinder or food processor.
If they potatoes don’t resemble a fine flour and look more like a dry mashed potatoes, they are not ready yet. You can always put the text potato batch back on the tray, spread it lightly and carry on drying.
How to grind your potato flour
Any kind of blender, food processor or grinder will do a good job at processing the potatoes into flour (but it’s best not to use smaller grinders such as a coffee grinder).
You could even crush the potatoes under a rolling pin (like crushing biscuits in a bag), but it would take long time to get the flour as fine as you’d probably like it to be.
I usually use a sieve to separate the large parts of potatoes and either run them through the grinder or food processor again or keep them for other uses (like making mashed potatoes).
What to do with any bigger pieces of ground potatoes
The chances are that no matter how carefully and perfectly you grind your potato flour, you might end up with slightly large pieces of dried potatoes that just won’t get any smaller no matter how you long you grind them.
Since we are making this potato flour at home, this is perfectly natural and I never expect to have the same results as if the potato flour was produced commercially in the big factory.
I always sieve the potato flour and keep the large pieces separately. I then use them for thickening soups or making them into a mashed potatoes.
I keep the large pieces of potato flour in a glass jar in a dark cupboard and usually use them up within 1-3 months.
Storing your homemade potato flour
I keep mine in an airtight container (usually plastic). I also find that the flour lasts longer when the potatoes are slightly overdried.
This way there is no moisture, which can start generating bacteria growth or start developing mould in the flour.
If your potato flour feels slightly damp when you process it, just leave it to dry more in the oven or somewhere hot before storing it.
How long does homemade potato flour last?
I usually keep my potato flour for about 3 months and I’ve always found it keeps well. I usually just made a smaller amount to make sure I use it up within this time, so I’ve never had any problems with my flour going off.

Other ways of making potato flour
Over the years I’ve also experimented with different ways of making potato flour.
You can make potato flour from pre-cooked potatoes, blanched or mashed potatoes, pretty much any type of potatoes you have at hand.
Potato flour from mashed potatoes
This version of making potato flour is best if you don’t have a suitable food processor or sturdy grinder to grind large dry potato chunks.
It’s also probably an easier way to make your potato flour at home, because you will be able to achieve a finer flour result.
Peel your potatoes and chop into smaller chunks to save time on boiling. Boil your potatoes (without any salt) until they are done and drain the water.
Mash the potatoes with a suitable potato masher or a fork and spread on the baking tray in a very fine layer (lined with parchment paper), use a dehydrator or dry the potato mash naturally.
Move around the mashed potatoes to make sure they are drying and not catching mould from the bottom of the tray.
Once your mashed potatoes are dry, put them through a food processor or grinder to make them into a fine flour.
Store in a large jar or plastic container with a lid and use within 3 months.
Potato flour from grated potatoes
Instead of fine slices, you can also grate the potatoes. When you do that, I usually use the larger grater because it’s quicker (but you can use the smaller one too).
The next step is to remove as much water as you possibly can by squeezing it in a colander or a sieve or even using a clean cotton tea towel. You’ll be surprised how much water comes out!
After that, just space out the grated potatoes on a tray and dry using one of the methods above.
Potato recipes
- Irish Potato Cakes >>
- Leak & Potato County Soup >>
- Traditional Potato Bread >>
- Baked potatoes (in crock pot) >>
Troubleshooting your potato flour recipe & frequently asked questions
If you have any questions, feel free to let me know in the comments below and I’ll do my best to answer them for you.
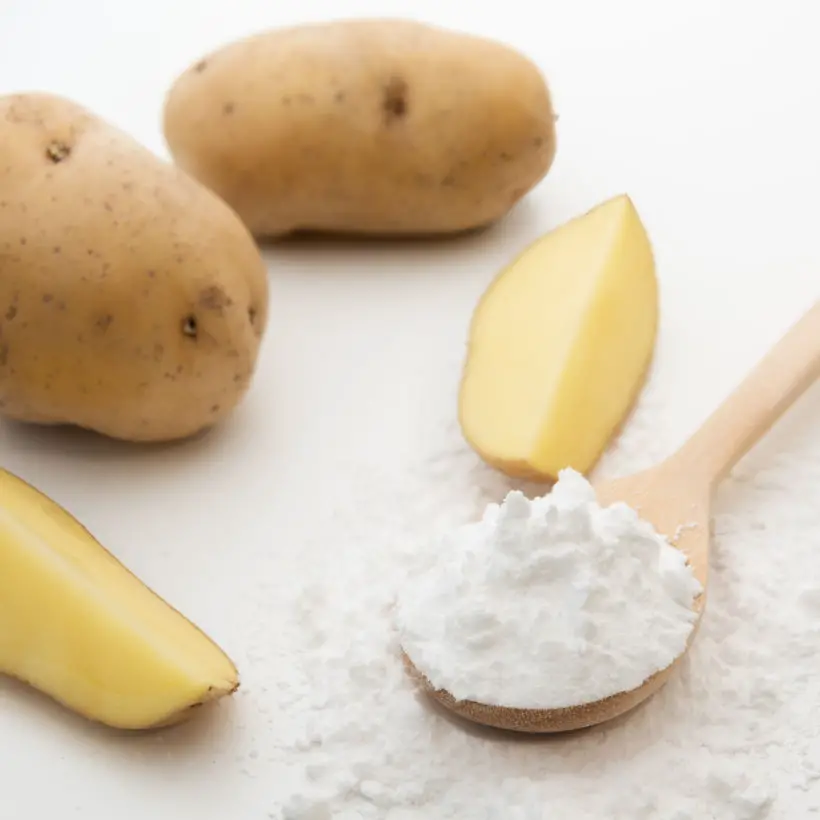
How many potatoes do I need to make my potato flour?
1/2 pound of potatoes (250 grams) will give you about 1 cup of potato flour (160 grams).
Homemade Potato Flour (from mashed or fresh potatoes)
Equipment
- Oven or dehydrator (but not required)
- food processor grinder or blender
- large tray
- greaseproof paper
Ingredients
- 1/2 pound potatoes or more/less if you like
Instructions
Option 1 – Homemade Potato flour from fresh potatoes
- Wash the potatoes properly under water using a potato brush or scrub them with a sponge.
- Slice the potatoes as thinly as you possibly can.
- Place the potato slices on a baking tray (or large tray) lined with a greaseproof paper.
Option 2 – Homemade potato flour from mashed potatoes
- Peel and cut the potatoes into smaller chunks.
- Boil the potatoes in the saucepan with water until soft.
- Pour the water out and mash the potatoes with a potato masher.
- Spread the mashed potatoes in to a thin layer on to a tray lined with greaseproof paper.
- Dry your potatoes as quickly as you can using the methods listed above (oven, dehydrator, direct sunlight, warm or hot room).
- The drying step can take anything from 4 to 10 hrs depending on which method you choose.
- Process the potatoes in a blender or a food processor until you get fine texture.
- Sieve the flour to get rid of large pieces (process them again or use to make mashed potatoes or to thicken soup)
- Store in a dry place in an airtight container and use within few months.
Nutrition
This blog post was originally written on 11 May 2021 and last updated on 19 March 2023


Easy enough to make, this potato flour is definitely worth the time! I’ve used some leftover potatoes and now have enough flour to add to my other gluten free mixes. I like to add it to pancakes too – it makes them very light.