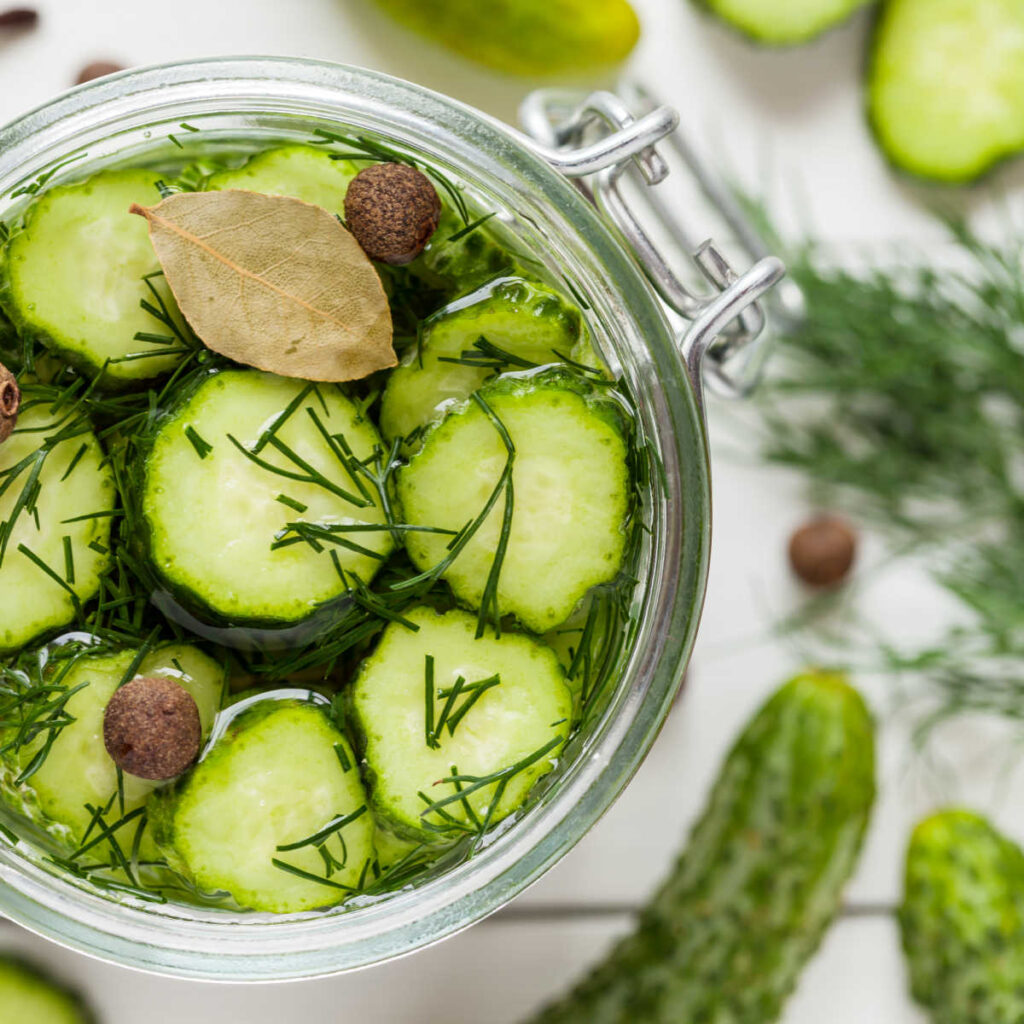
This cold pickling method is easy to use (no special equipment needed) and produces crunchy sweet & sour dill gherkins.
You can easily make this recipe is less than 30 minutes, but the recipe is done in two stages. You will need to wait at least a couple of weeks before you can eat the gherkins, but I promise it's worth the wait!
This recipe & me
My grandad was the king of the pickles! He would pickle just about any vegetables he harvested from his garden, and his pickled gherkins in sweet dill liquor were legendary.
The shop-bought ones never got closer to the homemade versions.
I think it's mainly because a lot of pickled gherkins are done just in salty vinegar, but it's the sugar that makes them so brilliantly flavoursome and delicious!
I've been trying to recreate my grandad's recipe for a while and whilst I always end up with a great batch of pickled gherkins, it's always ever so slightly different than the original taste.
Or maybe trying to remember how something tasted when you were 14 was never going to work anyway.
MORE PRESERVING RECIPES
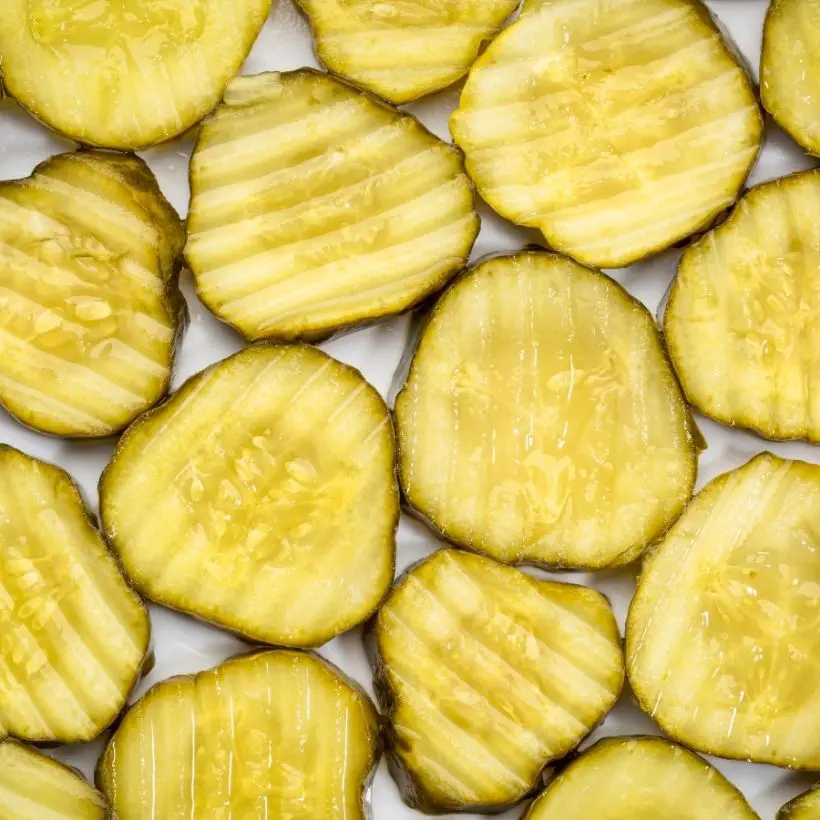
What Kind of Pickles Are We Making?
You might hear a lot of different names for pickles, like dill pickles, sweet pickles, or bread and butter pickles. The cold pickling method we are using here is often called "refrigerator pickling" in the United States. This name helps everyone understand that these pickles are not sealed for the pantry—they must be kept in the fridge!
Refrigerator pickles are super popular because they are so easy to make, and they keep your gherkins extra crunchy. My grandad knew the best way!
Many traditional canned pickles use a boiling water bath to make them safe to store on a shelf for months or even years. But all that heat can sometimes make the cucumbers a little less crisp.
Since we skip the boiling step and head straight for the fridge, our pickles keep that fantastic "snap" you want from a perfect gherkin.
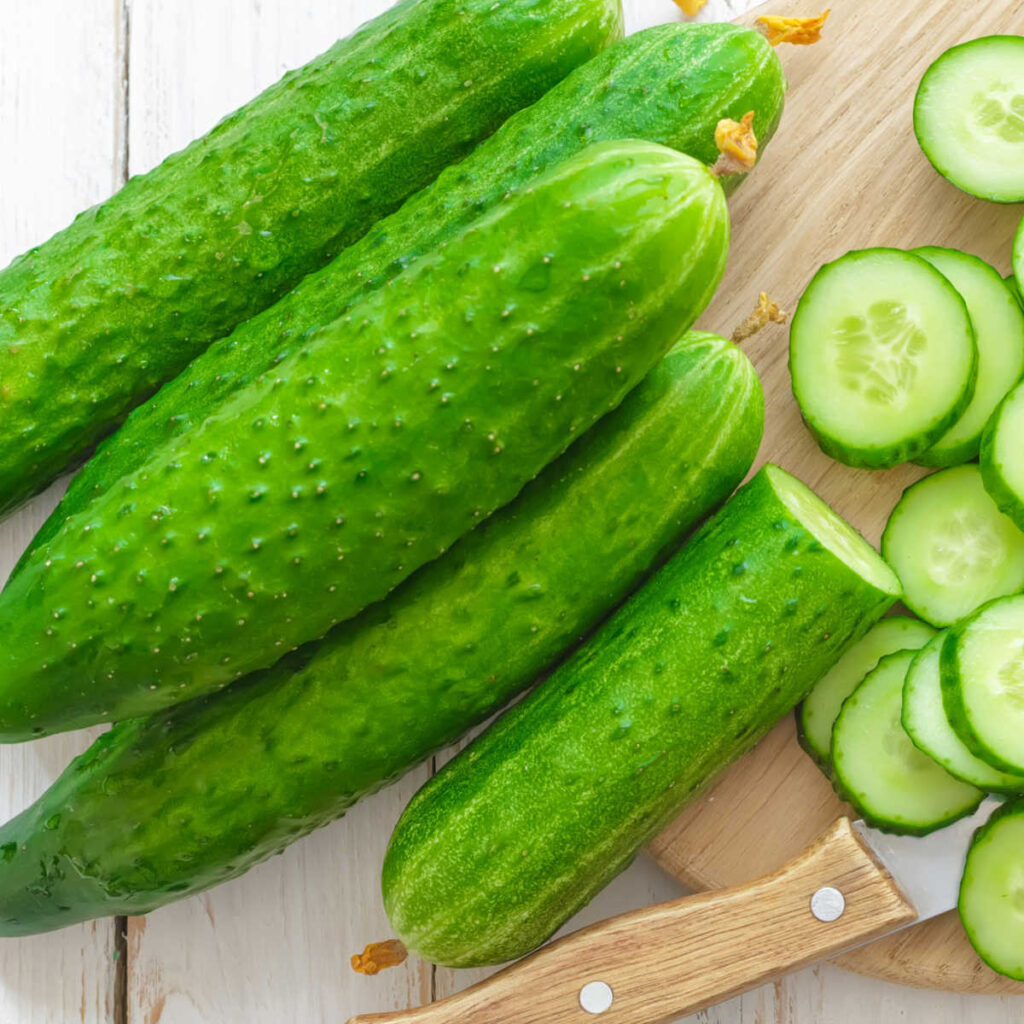
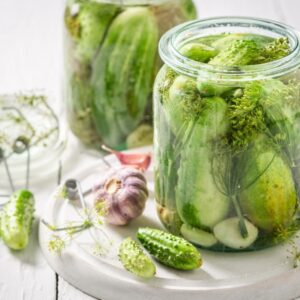
What type of gherkins to use
Gherkins are essentially small cucumbers (they are similar vegetable family as cucumbers) collected when they are small and still firm.
How to prepare gherkins for pickling
Whether you bought your gherkins or harvested them from your garden, you'll first need to clean them (with a hot water and with a brush if needed) and cut any gherkin blossom or fruit.
You need to check them over, one by one, and disregard any that are bruised, have a signs of animal eating it or any other blemishes.
What's cold pickling method
Cold pickling method can be used for pretty much any vegetables, not just gherkins, but it's a particularly useful method to know, especially if you are a beginner.
It's fairly fast method, that doesn't require you to have special equipment (like a pressure cooker).
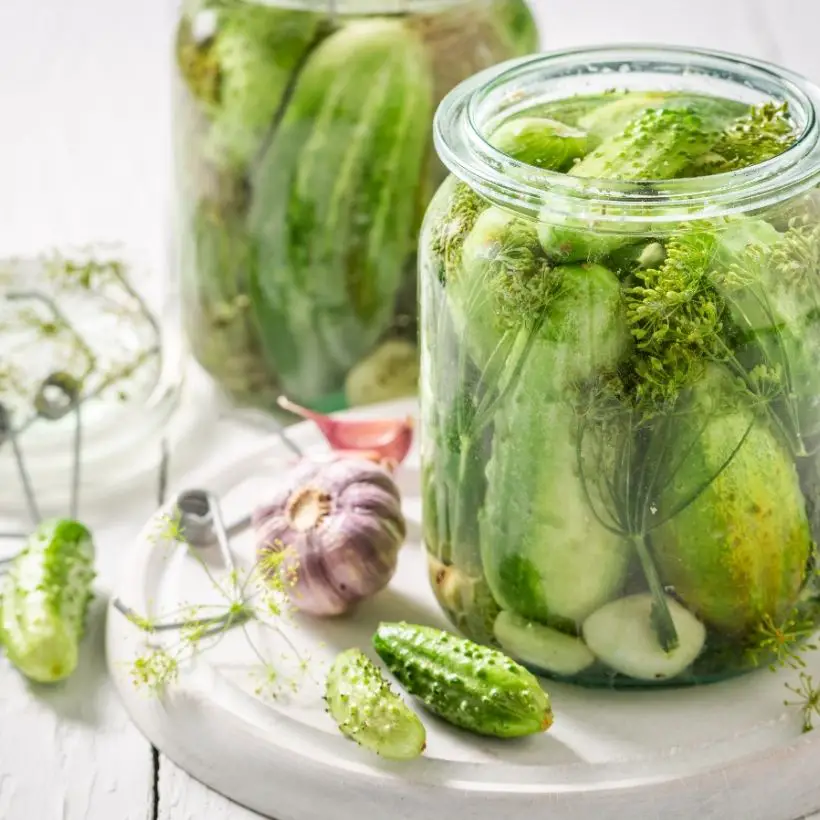
The cold pickling method usually consist of two stages - in first you leave the gherkins soak in salty water for several hours and then place them in the prepared sweet & sour dill brine and leave them to get infused with all that delicious flavour.
There is no need to can the jars or use boiling water to preserve them - you just keep them in the fridge.
But because we are not preserving the gherkins with a cold pickling method, they will have a shorter shelflife (only a few weeks). Because of that I usually make a smaller batch of these pickled gherkins (see the recipe below).

What equipment do I need to pickle my gherkins?
Sterilised jars & lids.
Ideally these should be all glass, like a masonary jars with glass lids and rubber sealing/
If you are using a metal lids, they should be lined with rubber/plastic as the vinegar can corrode any metal and your pickled gherkins might be spoiled over the time.
- Large plastic or glass bowl or mixing bowl to prepare your vinegar liquor
- Large plastic or glass for resting the gherkins (optional)
How to enjoy pickled gherkins?
Hm, do you really need to ask me that? I just eat them on their own!
But seriously, pickles gherkins are great accompaniment to meat, burgers, pate, ham and you can slice cucumbers to add to your sandwiches, cut up in small cubes to add to yoghurt dips or homemade soft cottage cheese.
My homemade pickled gherkins also go perfectly with my recipe for scotch eggs or sage meatloaf muffins.
How to make the right sweet & sour vinegar pickling liquid
I change my recipe all the time, so the bellow recipe is just a starting point for most of my versions of my sweet & sour gherkin pickles. Once you add your ingredients together, have a little taste.
If you find that there is not enough of kick from the vinegar or garlic or the taste is bland, change it before you pour it over your gherkins.
The gherkins will take on whatever pickle flavour you submerge in, so don't expect them to taste different than the pickling liquid!
I know that some (well most...) pickled gherkins recipes use just salt and not sugar. If you like that kind of flavour (e.g. your pickles will just taste salty), than that's fine.
But if you want your gherkins to have a bit of a bite and a juicy flavour, the sugar is essential in creating the sweetness.
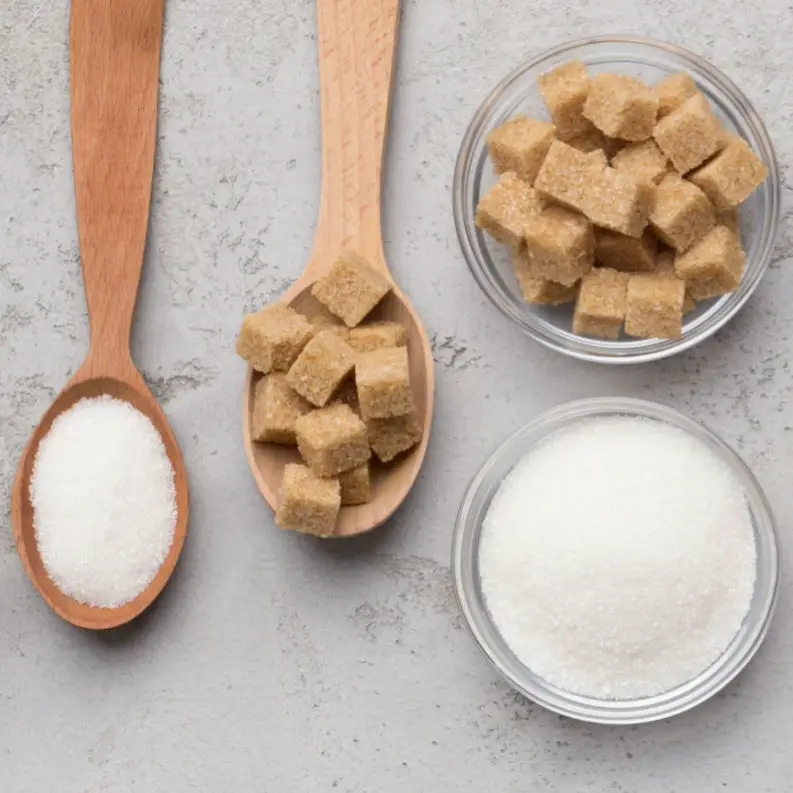
More on Ingredients: Why the Sugar Matters
In the world of pickles, there are two main flavor camps: sour and sweet-and-sour. My grandad's legendary recipe is right in the middle, giving you a bright, juicy flavor that tastes much better than just plain salty vinegar.
Think of it like this: the vinegar is the sour part, and the sugar is the sweet part. When you put them together, they balance each other out perfectly.
The sugar doesn't actually make the pickles taste too sweet, but it cuts down on the harsh, sharp taste of the vinegar. This gives you a smoother, more complex flavor that makes you want to keep reaching for another one.
Don't be afraid to taste your brine before you pour it over the gherkins. If it tastes great to you now, your pickles will taste even better in a few weeks!
Pro Tips for the Ultimate Crunch
The first step of soaking your gherkins in salt water, which is called brining, is the most important secret for a crunchy pickle. The salt actually draws out extra water from the cucumbers. This water loss is key because it makes the gherkin's cell walls stronger, which means they won't get soft and soggy when they soak up the pickling liquid.
Another simple trick for maximum crunchiness is to look for Pickling Cucumbers (or Kirby cucumbers) at the store or farmer's market. These types are perfect because they have thicker skin and less water than the long, regular slicing cucumbers you use for salads.
And remember to use the freshest ones you can find! The faster you get them from the garden or the store into your jars, the crunchier they will be. Some people even like to slice off the very end of the gherkin (the blossom end) because it can sometimes contain an enzyme that makes the pickle softer.
MORE PRESERVING RECIPES
Extra notes before you start making this recipe
Whilst the cold pickling method is quick and doesn't need any elaborate boiling, there are about 3 steps you need to allow time for.
Gherkin preparation - 24 hrs
Wash your gherkins, place them in a large plastic or glass mixing bowl in a layer and add salt in between each layer of your gherkins.
For 500g of gherkins, you'll need about 200g of fine salt. Pour over water and leave for 24 hrs. You can add few cloves of garlic if you wish.
Note: Using boiling water will result in slightly softer gherkins, but they will last a little bit longer.
Using cold water will help to keep the gherkins crunchy, but you'll need to eat them a lot quicker, once they are ready.
After about 12 hrs or 24 (the longer the more salty they will be) pour the water away and rinse any excessive salt.
Pickling the gherkins - 1 hr (approx.)
Mix together your favourite pickling liquid recipe (see below), place all gherkins in jars, packing them tightly and pour over the pickling liquid. Seal the jars.
Waiting for the pickling liquor to do it's job - 2-4 weeks
The longer you leave your cucumbers to pickle the better. The flavour develops with time, but they should be ready to eat within 2-4 weeks.
Getting Your Jars Ready: Sterilization
Before you start any preserving recipe, the most important step is getting your jars and lids perfectly clean—this is called sterilization. Even though we are not heat-sealing these pickles for the pantry, we need to make sure the jars are free of any germs that could spoil your tasty gherkins.
There are two easy ways to sterilize your jars. The fastest way is to wash the jars thoroughly with hot soapy water, rinse them well, and then place them on a baking sheet in a warm oven (about 225°F or 107°C) for about ten minutes. Another easy way is just to run the jars and lids through a very hot cycle in your dishwasher. Make sure you handle the sterilized jars with clean tongs or wear clean gloves so you don't accidentally put any germs back on them!

Choosing the Best Vinegar and Spices
The pickling liquid, or brine, is what gives your gherkins their special flavor. When you make your pickling liquid, you need to choose the right kind of vinegar for canning and the perfect mix of spices. Changing these ingredients can turn a simple pickle into something truly unique!
What's the Right Vinegar?
In the United States, most people use Distilled White Vinegar for pickling. This vinegar is clear and has a strong, clean flavor. It works perfectly because it lets the taste of the dill and sugar shine through. It's usually sold as 5% acidity, which is the right strength for safe refrigerator pickling.
Some recipes, especially ones that are sweeter, use Apple Cider Vinegar. This gives the pickles a little bit of a fruitier, softer taste and a light golden color. You can experiment with both, but stick with the Distilled White Vinegar for a classic, bright sweet and sour flavor!

The Magic of Pickling Spices
My recipe includes delicious dill (which is a must-have for these gherkins!) and garlic, but adding a few whole spices takes the flavor up a notch. These spices don't dissolve, but they sit in the liquid and slowly add depth to the brine. A traditional sweet pickle spice blend often includes:
- Mustard Seeds: These little yellow or brown seeds give a tiny bit of heat and a great classic pickle flavor.
- Coriander Seeds: These add a warm, citrusy, and slightly sweet background flavor.
- Whole Peppercorns: Use black or mixed peppercorns for a gentle kick of spice.
- Allspice or Cloves: Only use a tiny bit of these! They can add a warming, strong flavor that reminds some people of baking spices.

The Essential First Step: Salting and Rinsing
The very first step of soaking your gherkins in salt water, called brining, is the most important secret to getting that perfect crunch! The salt draws excess water out of the cucumbers, which firms up their structure so they can stay crisp when they soak up the vinegar later.
Choosing the Right Salt
When you are pickling, you must use pure salt. This means you should choose either Pickling Salt (which is very fine) or Kosher Salt (which is coarse). Do not use regular table salt, as it usually has additives like iodine or anti-caking agents that can make your pickling liquid cloudy and look strange over time.
Why So Much Salt? (The Ratio Explained)
You are absolutely right to question the ratio of 500g of gherkins to 200g of salt! This is a very high concentration (40% salt by weight) and it is meant to be. This heavy salting method is designed to quickly draw out the water and firm up the cucumbers.
Here's the key takeaway: You are not trying to make the pickles taste that salty! After the gherkins have soaked for 12 to 24 hours, you will pour off all the brine and thoroughly rinse the gherkins under cold running water. This washing step removes the excess salt from the surface, leaving you with firm, crunchy gherkins ready to soak up the sweet and sour flavor of your vinegar brine.
Keeping Your Pickles Fresh: Shelf Life and Storage
Since we are using the cold pickling method (or refrigerator pickling), our crunchy gherkins need a bit more attention when it comes to storage than pickles you buy in a jar off a supermarket shelf. Remember, we aren't using a boiling water bath, so we rely on the fridge to keep things safe and delicious!
How Long Will My Pickles Last?
Your pickled gherkins will be ready to eat in about 2 to 4 weeks after you jar them. This waiting time is super important because it lets the gherkins soak up all that wonderful sweet and sour flavor. Once they are ready, you should plan to eat them within 6 months. That's a good long time!
Because we didn't heat-seal the jars, the cold temperature of your refrigerator is what keeps the vinegar mixture safe and prevents any spoiling. Always make sure to use clean utensils when reaching into the jar to keep your pickles fresh for as long as possible.
Where Should I Store My Pickles?
Your pickled gherkins must be stored in the refrigerator at all times. This is non-negotiable for this quick, cold method!
It's best to keep them in a place where the temperature is steady, like the back of a shelf, and away from the door, which tends to be warmer. Also, a dark spot is better than a bright spot, so keeping them inside a dark kitchen cupboard or fridge is perfect. Storing them correctly ensures they stay crisp and safe to eat for those several months!
Pickled gherkins with dill and sweet & sour vinegar recipe
Ingredients
Overnight pickling
- 500 g small gherkins washed & cleaned
- 1 garlic bulb cloves separated, peeled and halved
- 200 g salt
- 1 ltr cold water more or less, but just enough to cover the gherkins
Pickling liquid
- 800 ml white vinegar
- 1/2 white onion, sliced coarsely
- 6 twigs of fresh dill few springs into each jar (keep them whole)
- 2 tsp mustard seeds
- 150 g white sugar or more/less to taste
- 1 tsp salt
- 1 bay leaf
- 1 tsp new spice whole
- 50 ml boiling water to dissolve the sugar
- 1 tsp black peppercorns whole
Instructions
Preparing your gherkins
- Wash and clean all gherkins first. Cut of any blemishes, stalks or flowers.
- Layer into a large bowl and add salt to each layer.
- Cover with cold water and leave for 12 or max 24 hrs.
- Rinse the salt away.
Preparing the pickling liquid
- Boil water and pour about 50 ml on the sugar, just enough to dissolve it. Stir before adding the rest of the ingredients.
- Add all the other ingredients (apart from dill if using whole) and mix everything together.
- If you are using dill as the whole herb, place it into the sterilised jars as you are layering your gherkings. Pack everything tightely in. If you are chopping the dill into smaller pieces, just add it to the main vinegar pickle.
- Once you have all gherkins packed in to the jars, pour the pickling vinegar over it, making sure that you distribute evenly all the ingredients between the jars.
- If you run out of the liquid, make up extra with just the vinegar, water.
- Make sure that all the gherkins are submerged in the water and that there is a about 1 cm gap between the water level and the top of the jar.
- Seal the jars and keep them somewhere in cold and dark place for a minimum of 2-3 weeks before you open them. This helps to develop the flavour (the longer - the better more intensive flavour).
Notes
Nutrition
This recipe blog post was originally written on 12 September 2020 and last tested and updated on 17 November 2025


Leave a Reply