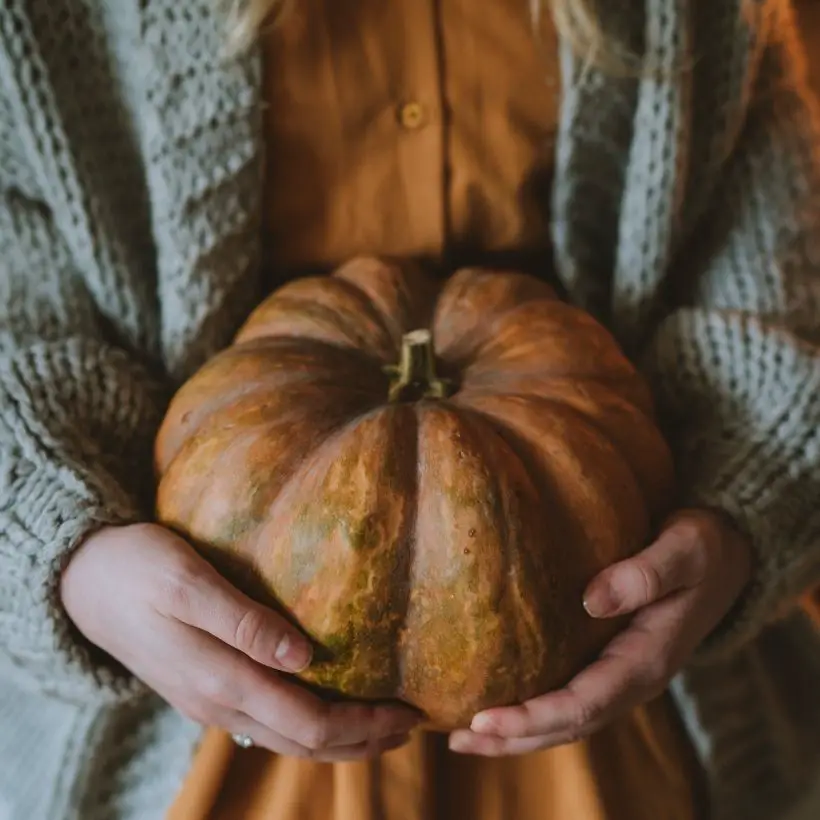
An effective way to keep your pumpkin harvest for the winter by pressure cooker canning. Step by step guide to how to preserve (or can) pumpkins at home. Canned pumpkin can be made into soups, puddings and cakes or a pumpkin butter.
Why make this recipe
Pumpkins are great! They are so versatile - you can turn them into savoury snacks, puddings and cakes or make them into a pumpkin butter, serve them with homemade crumble topping and enjoy on your morning pancakes.
The problem is that their season is fairly short and once they are gone, the pumpkin butter, puree or canned pumpkins can be a little pricey especially on the continent (or in UK).
That's why in this recipe ( or step by step guide), I wanted to share with you how to preserve (or can) pumpkins at home. I used to do a lot of food canning with my mum when I was little, so I thought I'd give it a go!
PUMPKIN RECIPES
- Homemade Pumpkin Butter >>
- Vegan Pumpkin Pie Spice & Oats Smoothie >>
- Spiced Pumpkin Muffins (Gluten-Free) >>
How to preserve pumpkins
Canning or preserving pumpkin is just a one way of keeping your pumpkin harvest for the winter and beyond.
You can also cut up the pumpkins into smaller cubes (the same as we will do later on...) and simply freeze them.
The problem is that you'll soon run out of space in your freezer, which is less likely to happen if you can them and store them in the back of your kitchen cupboard.
You can also choose to store your pumpkins in cold place in your house or out building if you have one. If you keep them on the straw or something soft and breathable, they should last for a good 3 months.
The problem is that most people end up with lots of scooped out pumpkin flesh after they have made their carved Halloween Pumpkins. The scooped out pumpkin flesh is not suitable for canning, but you can make it into a puree, butter, soup, cake or freeze it.
How to can (preserve) pumpkins
This recipe for canning pumpkin doesn't use any flavouring, spices or sugar or anything like that, as this gives you more options when you use the preserved pumpkins.
You can turn them into savoury foods (soups, sauces), add to smoothies, make them into pumpkin puree, pumpkin butter and much more. It's just like having a fresh pumpkin ready in your cupboard when you needed.
Equipment
- Large jars with lids
- Large pan (you can use marmalade preserving pan if you have one)
- T-towel (old, but clean one that you don't mind getting used)
- Pressure Cooker
- Thermometer
- Clock or watch
PUMPKIN RECIPES
How to safely preserve (can) your pumpkins
Use a pressure cooker rather than a water boiling pan
We didn't have a pressure cooker when I was growing up, so all I remember is that we've used large pot (that nearly didn't fit on the hob) to make all jams, preservatives and to can all vegetables, mushrooms and fruit.
Science has progressed in this area and new research suggests, that it's not a good idea to use a water bath for vegetables with a low acid content, such as pumpkins. So, if you want to make sure that you stay safe, use a pressure cooker to preserve your pumpkins.
The heat and the pressure within the pressure cooker ensure that the pumpkin cooks at the right temperature and all way through.
Sterilise your jars
This is the same process I follow whether I'm making pickles, jams or fruit curds, because it's important to have clean and sterilised jars to keep your preserves without getting them spoiled.
I'm sure you'd wash your jars, but you also need to sterilise them too to limit the possibility of bacteria developing inside.
Once your jars and lids are washed with a washing up liquid and hot water, place them on a clean baking tray. Heat the oven to 100C and place inside for 10 minutes when the oven reaches 100C.
Remove only when you are ready to add the pumpkin cubes. Place the sterilised jars on a T-towel or a wooden cutting board (with the clean T-towel over it) and add your pumpkin cubes.
PUMPKIN RECIPES
How to preserve pumpkins at home (pressure cooker method)
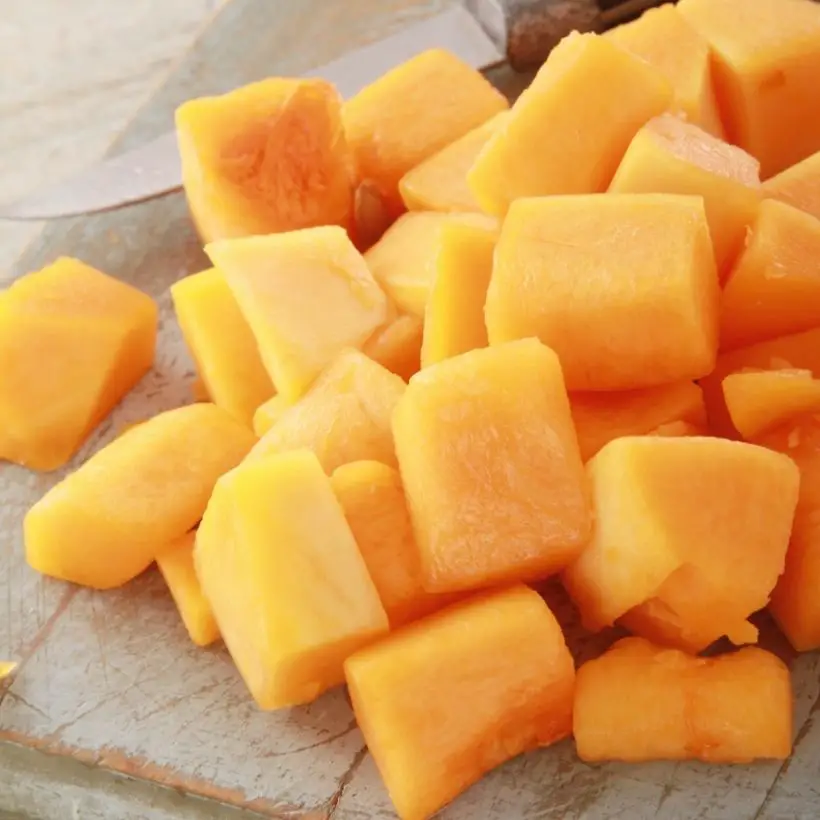
Cut up the pumpkin - first into half, then across into 2 cm (I inch) slices.
Cut off the thick skin from each slice and remove the seeds and the stringy middle bits.
Cut up the slices into 2 cm cubes.
In a large pan boil water and add all the cut up pumpkin cubes. Par-boil for 3 minutes to soften the pumpkin (but not to cook them or make them mushy)
Remove the pumpkin cubes from the hot water and place to sterilised jars, leaving about 1.5 cm gap from the top. Pack the cubes in tightly, but not squash inside.
Pour the water you've previously used for blanching the pumpkin cubes over the cubes and leave about 1 cm from the top. Make sure that all pumpkin cubes are covered with water - if not remove some, so that the jar is not overfilled. The water needs to be higher than the level of the pumpkin cubes and then you still need a bit of space between the water level and the lid level.
Shake & tap the jam jars a little to make sure you get rid of any air bubbles.
Add the lids on top of your jars and make sure they are tight.
Refer to your pressure cooker instructions on how long you need to keep your jars in. This varies from make to make and it also depends on the size of your jars.
As a guide, you'll need about 60 minutes for 0.5 lt jars
Once your jars are ready, leave them to cool down slowly in the pressure cooker (you can open it now)
Remove the jars and keep on the work counter until completely cold.
How to store preserved pumpkins
I usually keep all jars in a dark and cold kitchen cupboard. I always label the jars with the date I've made them, because it's easy to forger how long ago that was!
Once you make other preserves, things can get mixed up and you won't remember which jar is the next one that should be open.
How long will preserved pumpkins last ?
If canned correctly, your pumpkin jars should be fine for 2 years, but I normally don't keep them for more than 1 year (as we eat them well before then).

Preserving (canning) pumpkin cubes
Equipment
- Pressure Cooker
- Large Jars (sterilised)
Ingredients
- 1-2 pumpkins whatever you have
- water enough water to cover the pumpkin cubes in the jars and to par-boil the pumpkin cubes
Instructions
- Cut up the pumpkin - first into half, then across into 2 cm (I inch) slices.
- Cut off the thick skin from each slice and remove the seeds and the stringy middle bits.
- Cut up the slices into 2 cm cubes.
- In a large pan boil water and add all the cut up pumpkin cubes. Par-boil for 3 minutes to soften the pumpkin (but not to cook them or make them mushy)
- Remove the pumpkin cubes from the hot water and place to sterilised jars, leaving about 1.5 cm gap from the top. Pack the cubes in tightly, but not squash inside.
- Pour the water you've previously used for blanching the pumpkin cubes over the cubes and leave about 1 cm from the top. Make sure that all pumpkin cubes are covered with water - if not remove some, so that the jar is not overfilled. The water needs to be higher than the level of the pumpkin cubes and then you still need a bit of space between the water level and the lid level.
- Shake & tap the jam jars a little to make sure you get rid of any air bubbles.
- Add the lids on top of your jars and make sure they are tight.
- Refer to your pressure cooker instructions on how long you need to keep your jars in. This varies from make to make and it also depends on the size of your jars.
- As a guide, you'll need about 60 minutes for 0.5 lt jars
- Once your jars are ready, leave them to cool down slowly in the pressure cooker (you can open it now)
- Remove the jars and keep on the work counter until completely cold.
- If canned correctly, your pumpkin jars should be fine for 2 years, but I normally don't keep them for more than 1 year (as we eat them well before than)
This blog post was originally written on 7 September 2020 and last updated on 1 November 2022


Leave a Reply