
Rich chocolate cupcakes baked with caramelised beer. Deliciously soft, perfect as an afternoon treat or a great gift!
I like baking with unusual flavours, but in this recipe the beer is more than just a flavour. It reacts with the raising agent and makes the whole bake very light. The caramelised beer also makes the chocolate flavour extra rich like if you've used the most luxurious chocolate.
If you've already tried my yeasted beer bread or quick beer bread with self-raising flour, you are in for a treat!
Why make this chocolate beer cupcake recipe?
- Amazing chocolate taste (seriously the best chocolate cupcakes you'll ever eat!)
- Very light texture & moist
- Can be also used to bake a chocolate cake (bake in 6 inch cake tin or double for a large cake tin)
PIN TO KEEP FOR LATER

MORE CUPCAKE RECIPES
- Vanilla Cupcakes with Chocolate Frosting >>
- Orange Cupcakes with Blood Orange Frosting >>
- Lemon Drizzle Cupcakes >>
My tried & tested tips on baking this recipe
- Don't over mix the batter (let the beer do the heavy lifting)
- You won't taste the alcohol (as it will evaporate when baked), but if you want to you can swap the beer for coca cola
- It's best to use dark beer with this recipe like stout or Guinness
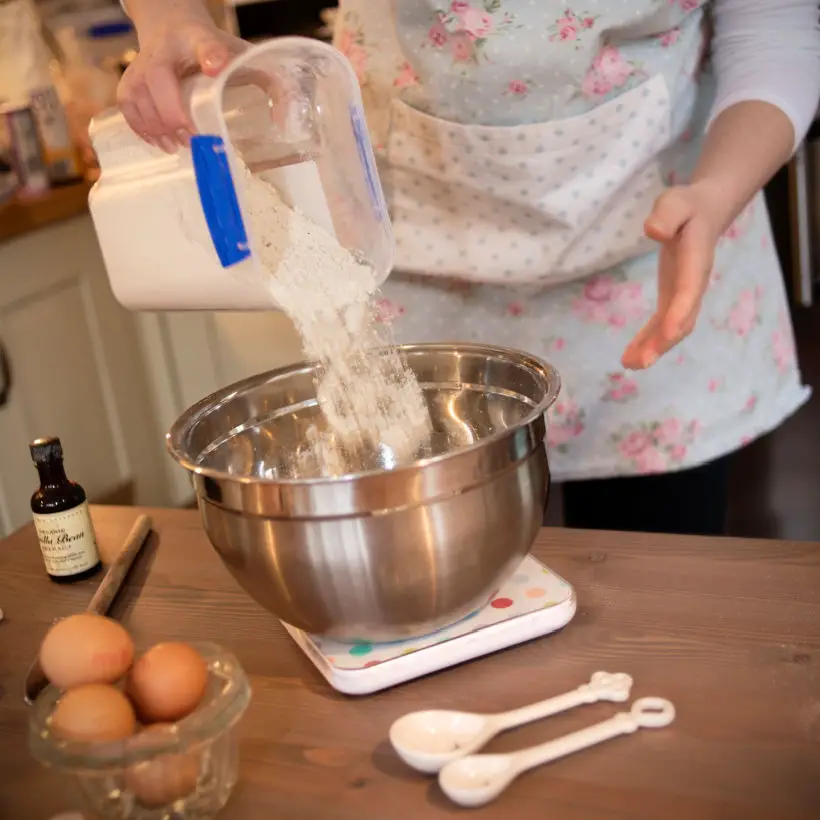
Notes on ingredients
Natural sugars, such as coconut or some of the coconut sugar alternatives, work great with the chocolate flavour.
- cocoa powder - use the best one you have for extra rich chocolate flavour
- beer - use Coca-Cola if baking for children
- butter - unsalted butter or if using salted don't use extra salt in the recipe
- dark brown sugar or light brown sugar is perfect
- eggs - difficult to substitute in this recipe, so don't try it
- plain flour - if using self-raising flour don't add any more baking powder or baking soda
- baking powder - for best results, use both baking powder and bicarbonate of soda
- bicarbonate of soda
- pinch of salt - always add this especially if you are using unsalted butter as it helps to bring all the flavours together
MORE CHOCOLATE TREATS
- Chocolate Pancakes (made with cocoa powder) >>
- Chocolate Bliss Balls (no bake) >>
- Coconut & Chocolate Fat Bombs (no bake) >>

How to make Chocolate Beer Cupcakes
Line a 12 large cupcakes tin with greaseproof paper or cupcake cases.
Preheat the oven to 170C.
Cream the butter and sugar together in a mixer until light and fluffy. This might take longer then usual cupcakes, because of the dark sugar.
Gradually beat in the eggs – one at the time.
In another bowl, sieve the flour, baking powder and bicarbonate of soda and keep to one side.
Place the cocoa powder in a bowl, add the beer and mix together.
Carefully mix the beer mix into the egg mixture.
Add the flour mixture. Mix very gently together.
Bake the cupcakes in the oven for 20 minutes or until baked.
MORE CHOCOLATE RECIPES

My favourite type of icing to go with this recipe
There are so many options you have here, but in case you need some inspiration, here are my favourite frosting flavours that complement my Chocolate Beer Cupcakes recipe best:
- Vanilla Frosting: A classic choice that adds a sweet, creamy contrast to the rich chocolate flavour.
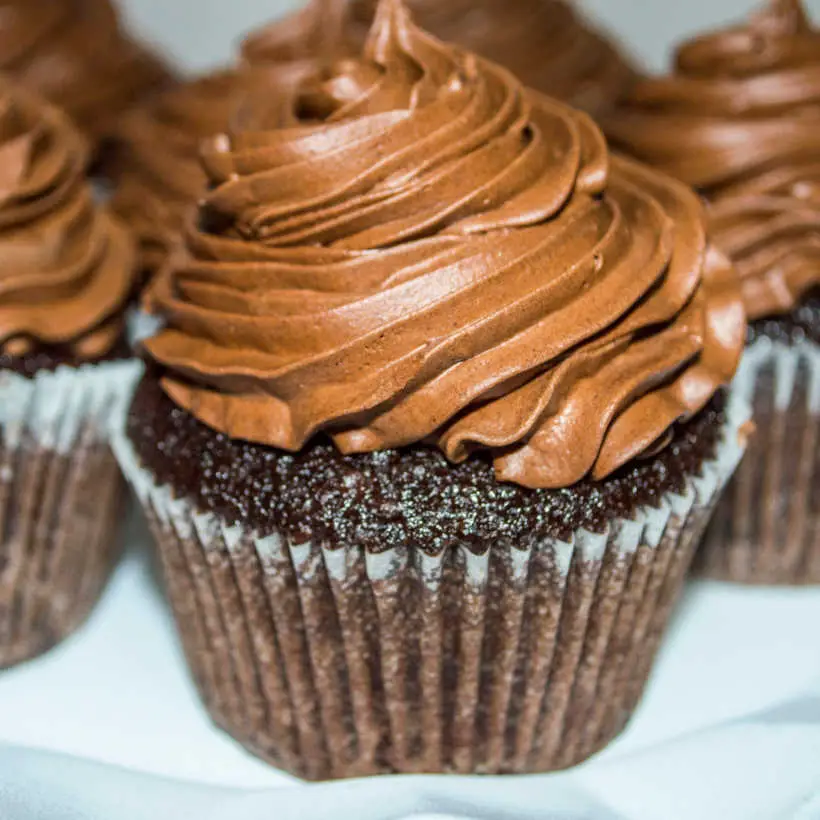
- Chocolate Frosting: see my basic chocolate frosting recipe below, perfect choice for chocolate lovers.
- Cream Cheese Frosting: Adds a tangy sweetness that pairs well with the deep flavours of the beer and chocolate.
- Peanut Butter Frosting: Use vanilla frosting and add a large dollop of peanut butter
- Salted Caramel Frosting: Adds a sweet and salty dimension that enhances the malty notes of the beer, but don't use too much as it can be quite sweet.
- Irish Cream Frosting: Make a regular vanilla frosting and add 1 tablespoon of Irish Cream, perfect for an adult treat.
- Coffee Frosting: Use my chocolate icing recipe, but leave out the powdered cocoa and add 1 teaspoon of instant coffee mixed with 1 teaspoon of hot water to dissolve.
- Mint Frosting: Gives a refreshing contrast to the rich chocolate, similar to a mint chocolate chip flavour.
- Orange Buttercream: Adds a citrusy twist that can brighten up the deep chocolate and beer flavours. Use orange flavouring instead of vanilla (use basic vanilla frosting recipe).

Basic Chocolate Icing Recipe
- 3/4 cup (1 1/2 stick) or 170 grams of unsalted butter, softened
- 1/4 cup unsweetened cocoa powder
- 2- 2 1/2 or 300 grams of cups powdered - icing sugar
- large pinch of fine salt
- 1 1/2 tablespoons of milk
Instructions:
Prepare Your Ingredients:
- Make sure your butter is soft. You can leave it out at room temperature for a bit.
- Measure out all your ingredients so they're ready to go.
Mix the Butter and Cocoa:
- In a large mixing bowl, add the softened butter and cocoa powder.
- Use a hand mixer or stand mixer to beat them together until smooth and creamy.
Add Powdered Sugar and Salt:
- Gradually add the powdered sugar, one cup at a time, mixing on low speed.
- Add the salt to balance the sweetness.
Add Milk:
- Slowly add the milk while mixing. This helps make the frosting smooth and spreadable.
Beat Until Fluffy:
- Increase the mixer speed to medium-high and beat the frosting for about 2-3 minutes until it's light and fluffy.
- If the frosting is too thick, add a little more cream or milk. If it's too thin, add a bit more powdered sugar.
Frost Your Cupcakes:
- Once the frosting is ready, use a spatula or a piping bag to frost your cooled cupcakes.
How to store & keep your homebaked chocolate beer cupcakes
You can store home-baked chocolate cupcakes for a few days, and the best way to keep them fresh depends on whether they are frosted or unfrosted.
If your cupcakes are unfrosted, you can keep them in an airtight container on the counter for up to two days. If you need to store them longer, you can put them in the fridge for up to four days. Just make sure they are in an airtight container so they don't dry out.
Alternatively you can also freeze them on the same day as you've baked them and just defrost them when you need to (and make a fresh batch of frosting).
For frosted cupcakes, it's a bit different. I always prefer to keep frosted cupcakes in an airtight container in the fridge for 1-2 days. They will last longer, but the buttercream frosting might start to dry out a little and I wouldn't advice to keep the cupcakes beyond 3-4 days (as the buttercream has a fresh milk and butter in.
Are Chocolate Beer Cupcakes alcohol free?
Homemade chocolate beer cupcakes generally aren't considered alcoholic by the time they're ready to eat. Most of the alcohol in the beer evaporates during the baking process, which means that they are pratically alcohol free and safe for children or anyone who doesn't like alcohol to consume.
If you add any alcohol to the buttercream frosting, then it will keep the flavour and the alcohol as the buttercream is prepared cold. There is a way around this too. Over the years I've tried different alcohol flavour essences and they work really well if you want a hint of say Irish Cream, but not the alcohol.
Chocolate Beer Cupcakes
Equipment
- 1 baking tray for 12 cupcakes regular size
- 12 cupcake paper cups
Ingredients
- 50 g cocoa powder
- 200 ml stout (Guinness or Coca-Cola0
- 100 g soft unsalted butter
- 275 g dark brown sugar
- 2 eggs
- 175 g plain flour
- ¼ teaspoon of baking powder
- 1 teaspoon of bicarbonate of soda
- pinch of salt
Instructions
- Line a 12 large cupcakes tin with greaseproof paper or cupcake cases.
- Preheat the oven to 170C.
- Cream the butter and sugar together in a mixer until light and fluffy. This might take longer then usual cupcakes, because of the dark sugar.
- Gradually beat in the eggs – one at the time.
- In another bowl, sieve the flour, baking powder and bicarbonate of soda and keep to one side.
- Place the cocoa powder in a bowl, add the beer and mix together.
- Carefully mix the beer mix into the egg mixture.
- Add the flour mixture. Mix very gently together.
- Bake the cupcakes in the oven for 20 minutes or until baked.
- Use ready made (or homemade icing of your choice). I really like chocolate icing with this recipe (see the main body of the recipe), but vanilla or red velvet flavour with cream cheese frosting also works great.
Notes
Nutrition
This recipe blog post was originally written on 28 December 2020 and last tested and updated on 26 November 2024



Leave a Reply