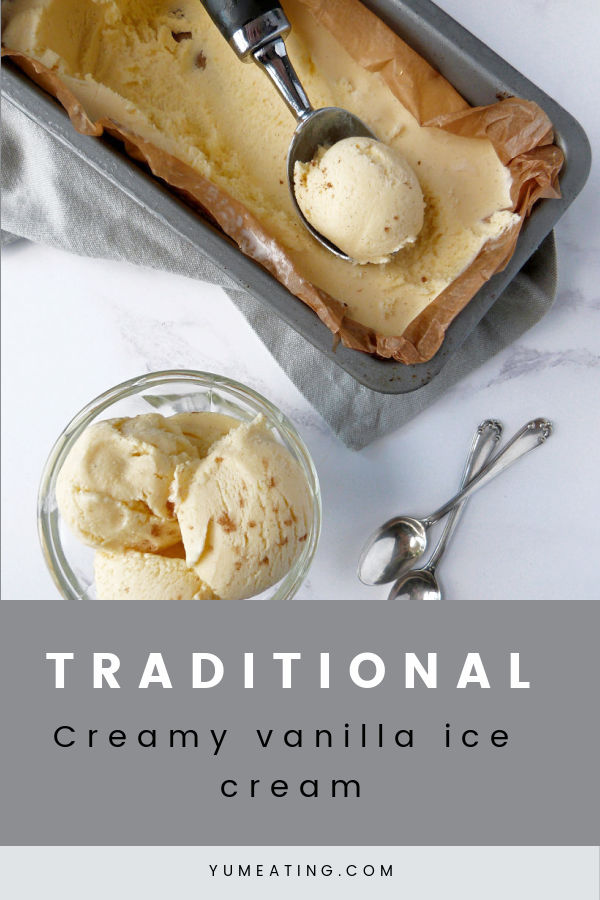
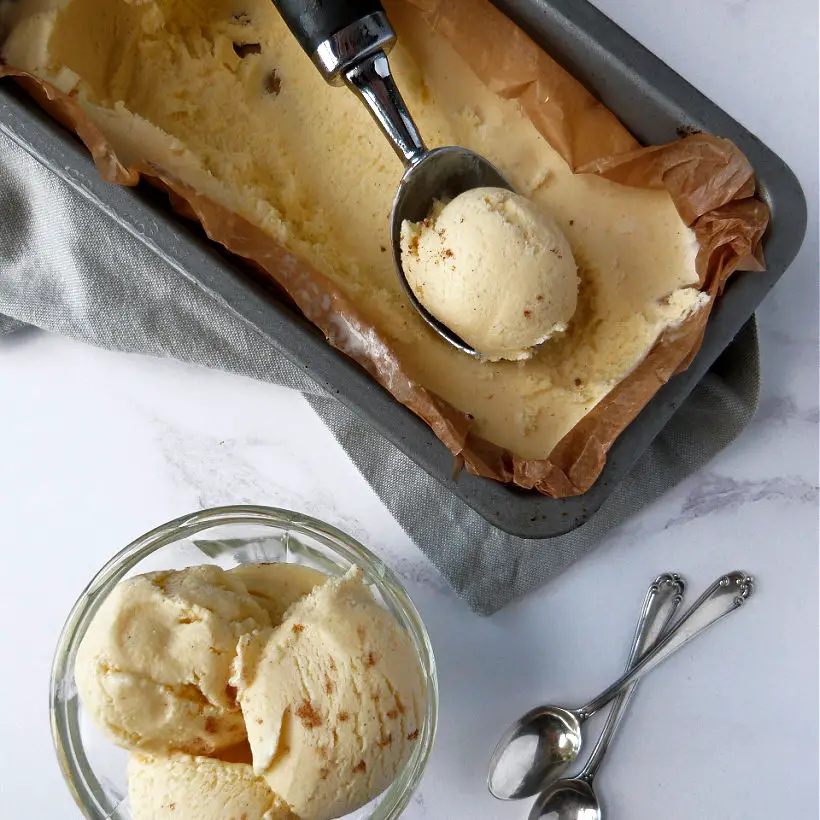
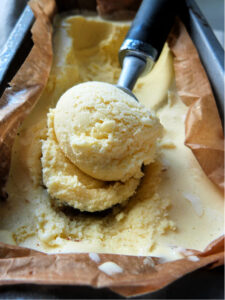
Traditional extra creamy vanilla ice cream recipe made with egg yolks and without ice cream machine. Reasonably easy to make recipe and totally delicious to eat!
I've always loved the science of re-creating recipes at home that look like they should be only made in a large food factory with lots of complicated steps, machinery and secret recipes.
What always intrigues me is that most of these products started in somebody's kitchen with very simple equipment back in the days when no machinery even existed.
PIN THIS RECIPE TO KEEP IT FOR LATER
MY OTHER ICE CREAM RECIPES
Making ice-cream the traditional way
The history of ice cream making is fascinating. We take it for granted, but how do you even make ice cream when you don't have a freezer?
But that's exactly what happened - the first ice cream was made before the invention of the freezer, when the ice cream was kept frozen by ice that was bought once a year (in the winter) and stored in your ice house.
I say, 'your' loosely, because unless you are the descendant of a rich family, you wouldn't even have had an ice house or tasted ice cream in your life!
I wanted to start my journey into ice cream making with something very traditional, so I've chosen a classic vanilla ice cream. I thought, I better make a traditional recipe, before I start tinkering with the ingredients.
Why make this recipe
- Very rich in flavour
- Traditional method of ice cream making (no need to use ice cream maker)
Vanilla ice-cream is very versatile, because you can use it to make luxurious puddings, serve with cakes (you can find more cake toppings ideas in my recent blog post about frosting for lemon cake) or eat it as it is with a simple syrup or chocolate sauce.
What makes this recipe work
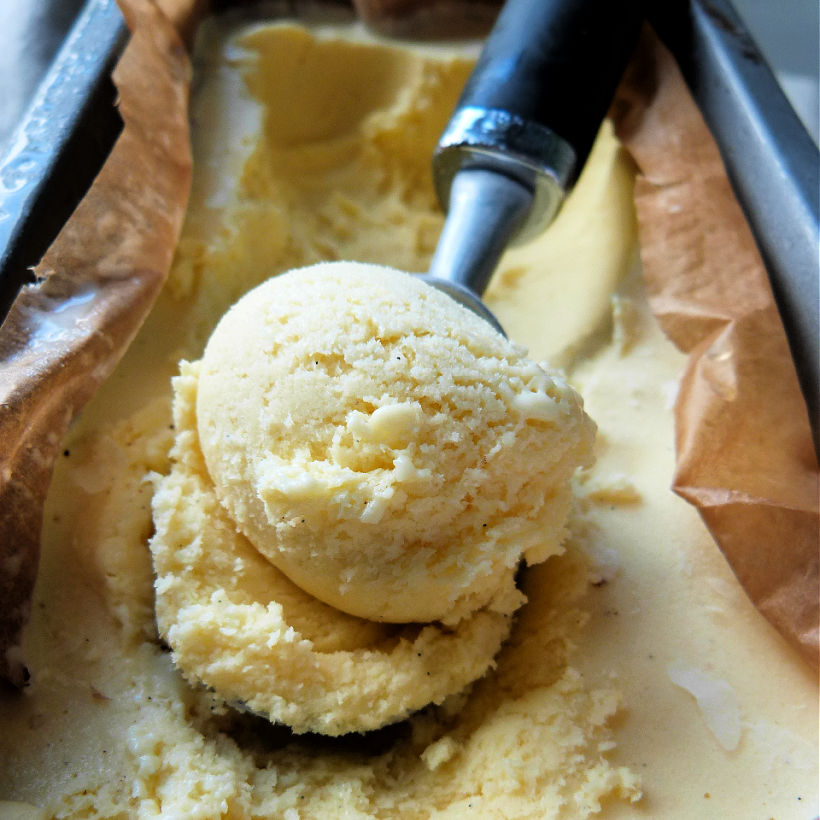
Using egg yolks makes this recipe extra creamy and tasty. The fat in egg yolks emulsifiers the whole mixture, which makes the ice cream really creamy and smooth.
Using good quality vanilla extract or paste is also crucial, as the flavour will depend on it.
Equipment you will need
Electronic - handheld whisk or standing mixer or food processor
Larger plastic container suitable for freezer use
Freezer
Notes on ingredients for traditional vanilla ice cream recipe
Cream
I've used organic double cream for this recipe, but you could use single or non-organic cream too. The higher the fat content the creamier the ice cream.
Milk
I've used full-fat cream, but semi-skimmed milk would work too. Similarly like the cream, the higher the fat content the creamier the ice cream.
Sugar
Traditionally, white sugar would be used for making this ice cream, so that's what I've used too. There are ways of making ice cream healthier, but this time, I've kept to basics.
Yolks
Whilst the cream and milk are the main ingredients in the ice cream, it's the egg yolks that add the colour, extra fat and the creamy consistency. If you want to make traditional vanilla ice cream, don't skip them.
There are lots of other ice creams out there that don't use eggs, but it's lovely to try one that keeps to the original recipe.
You can freeze the egg whites, or turn them into light meringues, white angel cakes, marshmallows or in my case they usually end up in egg white omelette or as simple microwave eggs in a mug.
Pinch of salt
I keep saying this pretty much with any recipe I make but salt brings all the flavours together, so don't skip this ingredient.
Saying that, everyone's taste buds are different, so I challenge you to do a little test. Put all the ingredients together and before you start to warm up the custard, taste it. If you like the taste, that's great, don't change a thing.
But if you think: 'Hm, this could really do with something, hm, it's a little bland...', please trust me and add a tiny pinch of salt. Stir and let the salt dissolve. Then take a sip of water and try to taste your ice cream again! What do you think? Any difference?
Vanilla
So....as Siobhan Sharpe from Perfect Curve would say: OK, so, here's the thing... I love vanilla and I really wanted to make traditional vanilla ice cream, but standing in front of a baking shelf in my local supermarket looking at the price of real vanilla pods I quickly backtracked from my original idea and bought the next best thing - vanilla extract!
To be fair, the vanilla extract was still more expensive than gold, but hey, who needs a new pair of earrings, when you can have real ice cream!
But, in all seriousness and since the main flavour of this ice cream is vanilla, go for the best vanilla extract, essence or even pods, you can afford.
Quick summary of traditional ice-cream making method
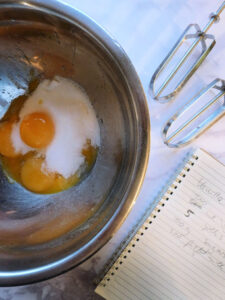
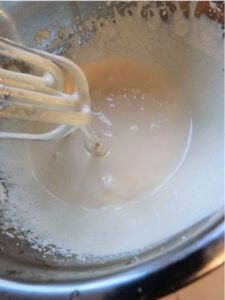
Whisk the egg yolks with the sugar and pinch of salt.
Add the vanilla extract and stir in.
Gently warm milk, cream and the egg mixture and whisk until thickens
Cool down & place in the freezer
Whisk every 30 minutes and place back in the freezer.
Whisk & freeze another 4 times (minimum)
Pour into a final container and freeze until needed
Eat within 3 months
Few extra tips on making this traditional vanilla ice cream
To compensate for not using churn or ice cream maker, you do need to remove the ice cream container every 30 minutes or so and whisk the ice cream mixture to prevent it from setting to much and also preventing it from creating frozen areas on the ice cream.
What to look for when making this vanilla ice cream recipe
Whisk the egg yolks and sugar until you get a very smooth mixture and the colour changes from bright yellow to pale or pastel yellow.
Warm the milk, cream and the eggs very slowly and below the simmering point. If you heat up the mixture too much, your eggs might curdle. Be patient and don't rush this part, it can easily take at least 15 minutes to get to that stage.


Your custard (cream/egg mixture) will be ready when the back of a spoon is coated evenly and thickly. The custard will thicken.
Don't be tempted to whisk the mixture too quickly when you are heating it up. It will curdle if you whisk it too quickly.
Cooling & freezing your traditional ice-cream
Cool down the ice cream mixture first before placing in the freezer. This will speed up the process and won't warm up the freezer.
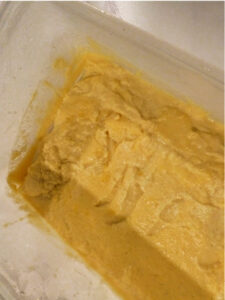
Place the custard mixture into a suitable container for both freezing and whisking. I use a stainless steel bowl with a lid. I place it in the freezer and when the sides get slightly frozen take it out and whisk it until smooth. You need to repeat this every 30 minutes or so. Breaking down the ice crystals prevents the ice cream from crystallising.
When I'm done with the churning (after the last whisking) I simply pour the ice cream into a final container (plastic airtight box or 2 pound loaf tin with something you can use as a lid)
How long does homemade vanilla ice-cream last?
Your homemade ice cream should be fine for a minimum of 1-3 months, but can be stored in ideal environment of -18C for about 4-6 months.
Ice-cream is sensitive to changes in your freezer and if the temperature drops or changes it can defrost it slightly and then freeze it again. This can cause ice to form on the surface of the ice cream and it spoils the taste a bit.

Creamy Vanilla Ice Cream
Ingredients
- 300 ml double cream
- 300 ml full-fat milk
- 100 grams caster sugar
- 5 egg yolks
- large pinch of salt
- 2 1/2 teaspoons vanilla extract
Instructions
- In a large bowl whisk the egg yolks with the caster sugar and a large pinch of salt, until it's thick and creamy and the colour changes from bright yellow to pale yellow.
- Pour the milk and cream into a medium size saucepan (don't heat it up just yet)
- Gradually add the eggs mixture and carry on gently whisking until incorporated
- Add the vanilla extract and stir in.
- Switch the cooker on and start warming up the cream mixture very slowly. Don't go beyond very low simmering point on a low to medium heat, whilst constantly steering or whisking.
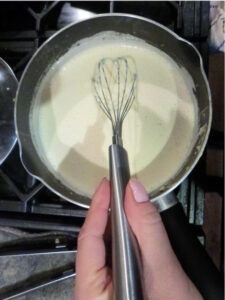
- Carry on cooking for about 10-15 minutes until the mixture thickens.
- Pour into a suitable bowl (for freezing and whisking) and leave to cool down completely - first in room temperature and then in fridge.
- Place in the freezer initially for 30 minutes or until you see that the cream sides are starting to set.
- Take the container out of the freezer and whisk the ice cream mixture for few minutes.
- Place back into the freezer and leave for another 30 minutes or so.
- Repeat this process about 4 more times or until the mixture is nice and light and looking exactly like ice cream.
- Transfer to your final choice of container.
- Leave to freeze until you are ready to serve your ice cream.
- Use within 3 months.
Notes
Nutrition
This blog post was originally written on 26 October 2020 and last updated on 2 November 2022


I love ice cream at any time of the year and a good vanilla ice cream is one of the best. This recipe got me craving ice cream despite the fact that I’m currently sitting at my desk with frozen feet !
This looks so good! Perfect for enjoying with lots of autumn puddings 🙂
This looks delicious. I eat ice cream all year around – it is great with a crumble or pie in winter – and firmly believe home-made is much better than shop-bought every time.
Looks scrummy, I much prefer “proper” custard based ice cream to the no churn cheats stuff – the extra effort is really worth it!
Thanks for sharing, looks lovely perfect to enjoy with puddings or on it’s own 🙂