Troubleshooting guide to the most common problems people have with their sourdough starter, including inactive starter, sour or mild flavour, black mould on the top and more!
Sourdough bread baking is a fairly complex baking process, and many people struggle with getting started and especially establishing their new sourdough starter.
The problem, in my opinion, is that sourdough bread baking is like a science, where you constantly need to consider all the external elements and constantly adjust your method.
What works one day, might not work in exactly the same way next week as your kitchen might be slightly different temperature, you use different bread flour, and the starter is less or more vigorous than the previous week.
What’s important to realise and I hope this will reassure you, is that in the majority of cases you are still going to end up with fabulously tasty bread and a great sense of achievement!
MORE SOURDOUGH BREAD RESOURCES
Your success with sourdough bread baking will depend on your sourdough starter, so today I wanted to focus on troubleshooting the most common problems people have with their sourdough starter.
I've been baking sourdough bread for the last 22 years or so and taught over 10 years (and hundreds of students) Sourdough Bread Baking classes.
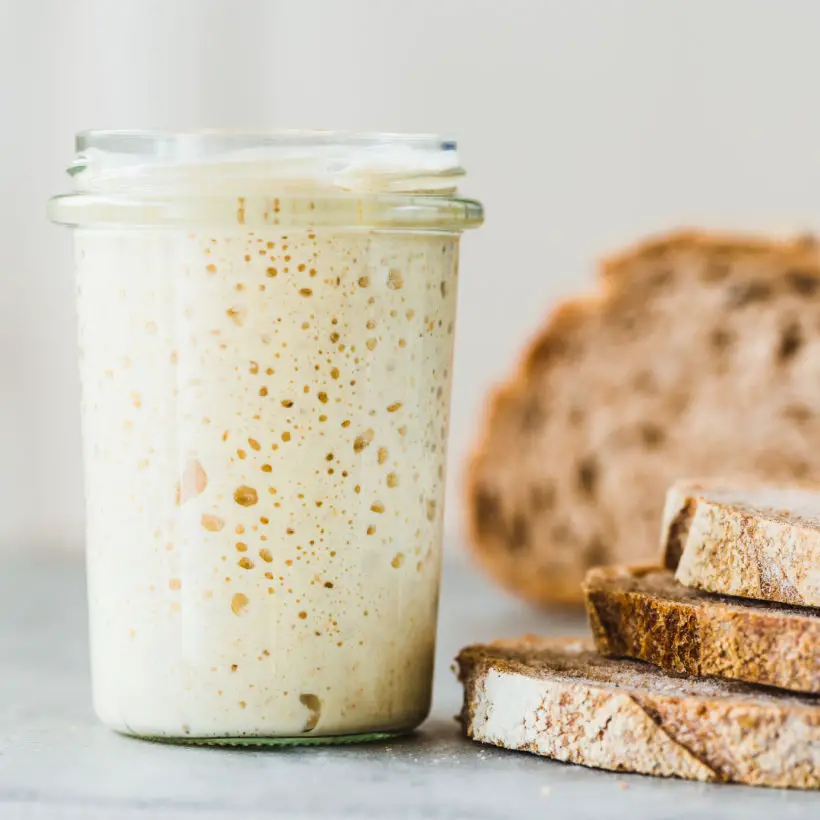
What to do if your sourdough starter is limp and not bubbling
Use the right type of flour to feed your starter
Use flour with rougher particles as these have extra bacteria that can get the starter bubbling again. This is, for example, rye, spelt, wholemeal, stoneground organic flour or at least unbleached white bread flour.
Stir your sourdough starter
Mix or stir your sourdough starter to increase the oxygen in the mixture, which will get the starter going again. You can use a fork or even a whisk. When my starter was very limp, I’ve used an electric whisk for a few minutes, and it did the trick.
Keep the sourdough starter warm
Keep your sourdough starter in a warm environment as it needs at least 23C to get started, but don’t overheat it (which can actually kill it). This could include sunny windowsill, hot water or boiler cupboard, warmer room or even next (but not touching) to a radiator.
Other options include keeping the sourdough starter in a microwave with the microwave door open, which keeps the light on. This is enough heat to keep the whole sourdough starter nice and cosy. Wrap your sourdough container with a tea towel to prevent any heat loss.
I’ve also known people to use a heating pad to stand their sourdough jar on. These are either the one you buy for tropical animals or for warming up your dinner plates. The heat from these heat pads is close to a body temperature, which is, again, the perfect temperature for sourdough starter.
Use the right type of water
If you can use non-chlorinated water as chlorine can kill your starter. Use at least filtered water or boil water and leave it to cool down before you use it.
Use warm water
Every time you replenish your sourdough starter, make sure you use a warm water to help the starter getting active quicker.
Be patient!
So, whilst most sourdough recipes tell you that your sourdough starter will be ready in a week, it’s not uncommon to wait until 14 or 21 days before the sourdough starter is vigorous enough to work.This is because recipes are based on ideal conditions, and as you have probably realised, that’s not always the case!
So, don’t be disappointed if your sourdough starter is not bubbling and ready in seven days, keep at it, and you will be rewarded soon enough!
Don’t forget to feed your sourdough starter
I’m sure that you know that you meant to ‘feed’ your sourdough starter, but without knowing why, you might not realise how crucial this bit is.
The good bacteria needs to feed on something, which is what’s happening when you add fresh flour and water. You are increasing the number of fresh bacteria and ‘food’ for the existing bacteria to much on.
Don't forget to discard about half of your sourdough starter first before new feed. You can always use the discarded starter to make pancakes or other treats.
Use other ingredients to help the sourdough starter get underway
Use water enriched with potato starch, by boiling a small chopped-up potato until it goes mushy. Strain the water and use it as the water for the next sourdough starter feed.
Add few crushed grapes, fresh pineapple, orange or apple juice to increase the acidity of your sourdough starter.
You can also grate a ¼ of an apple and add it to your sourdough starter. Leave it in until it starts to bubble and then either carefully remove it or put the sourdough starter through a sieve.
MORE SOURDOUGH BAKING RESOURCES
- How to dry sourdough starter >>
- How to freeze sourdough starter >>
- Is sourdough bread gluten-free ? >>
I forgot about my starter and now it has a black layer of thick water on the top. What shall I do?
I’m all for saving things when I can, so first of all slowly pour of scoop out the black water until you get mainly the flour and only some water. The black water is an alcohol created by the wild yeast bacteria and will only make your sourdough starter more limp and sour.
Treat it as if it was a ‘new’ starter, so leave it out in a warm environment and feed it regularly using the same amount of water and flour as the original amount of old starter you are left with. Don’t forget to discard your sourdough starter regularly too.
Use ingredients, like a rye flour or methods, like whisking the whole starter, described in this blog post above to give the starter good chance of recovery.
READ MORE
- How to stop your sourdough starter from going mouldy >>
- Can sourdough starter go bad + How to fix it >>
How can I tell that my starter is ready?
When you are first starting with sourdough bread baking, your sourdough starter will take at least 7 days to get established, but often it can be longer. Counting the days is usually not enough, you also need to look for signs to re-assure yourself that your sourdough starter is ready to be used.
Your sourdough starter needs to be fed with fresh flour and water about 6-10 hrs before you want to bake with it. This makes sure that the wild yeast has enough energy to ‘lift’ all the other flour in your bread.
After the last feed, your sourdough starter needs to double up in size. You can put a rubber band or mark where your sourdough starter level is before you feed it. When it doubles in size, your starter is ready to be used.
Your sourdough bread starter will smell sour when it’s ready, but it will be a mellow, pleasant sourness. The final smell depends on what type of flour you use, generally speaking, white flour sourdough bread starter will be more mellow than rye flour.
READ MORE
Controlling the sourness of my sourdough bread
By definition sourdough bread is sour by taste, but the sour taste, to an extent, can be controlled. I like my sourdough proper tangy and sour, but I know some people prefer a more mellow type of sourdough. Here is how to control this:
If you want mellow, low sour taste
- Use white bread flour for your starter
- Prove your bread in a warmer environment to make sure less acid is produced by the bacteria.
- Use a large amount of sourdough starter (about 150g for a recipe that uses about 500g of main flour) for baking your bread as this decreases the amount of time your bread needs to prove, which means fewer acid bacteria is produced, and your bread will be less sour.
- Add up to 1 teaspoon of baking soda to your final sourdough bread mix. This balances the PH levels of the sourdough starter, and your bread will be less sour.
If you want deeper, tangy sour taste
- Use rye, wholemeal or spelt flour for your starter and the main bread.
- Use fridge (cold space) to prove your bread over a longer period of time.
- Use less sourdough bread starter (or as stated in the recipe) and make sure that your bread takes a long time to prove.
- The longer the proving time, the longer the fermentation, the more tangy and round sourness you’ll achieve.
MORE SOURDOUGH BREAD BAKING RESOURCES


Leave a Reply