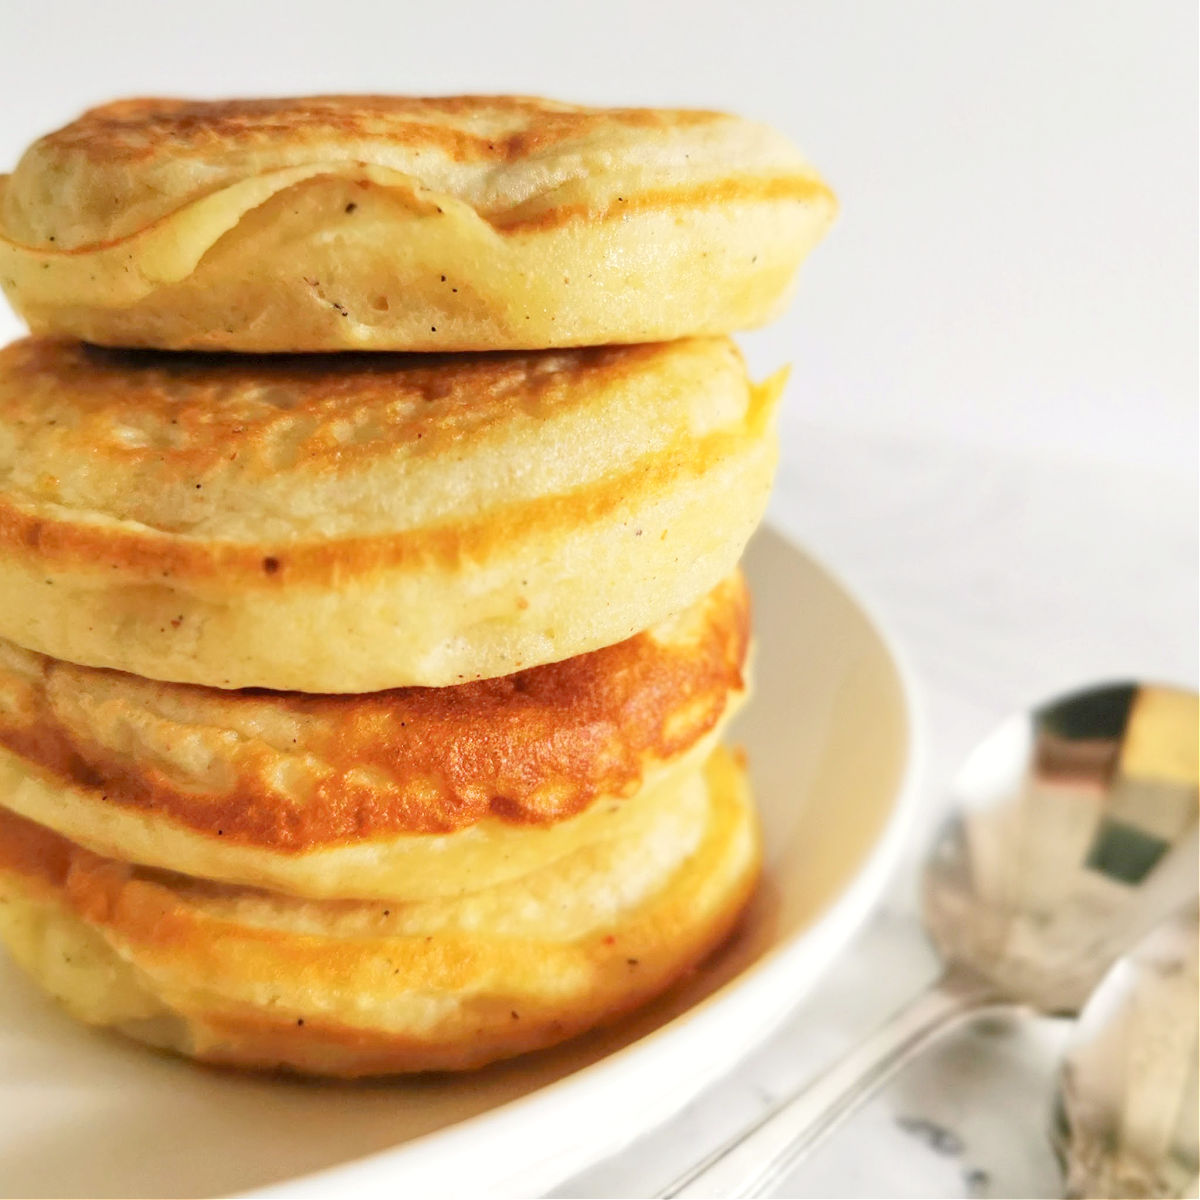
Light & fluffy pancakes flavoured with a vanilla extract made with whipped egg white and raised with yeast. Easy to make recipe, that’s delicious for breakfast or mid morning snack.
You might need to wait a little longer for these delicious pancakes, but they are so worth it!
If you’ve already tried to make pancakes with sourdough discard, you’ll know that wild yeast works wonders in a pancake batter. This recipe takes that idea a bit further using proper baker’s yeast.
If you need something a little quicker to make, I’d suggest trying my other Pancakes Recipes which is made with baking powder.
MORE PANCAKE RECIPES

Why make this recipe?
- Light & fluffy pancakes
- Taste delicious – especially when served warm
- Try something different with this pancake recipe raised with yeast instead of baking powder or baking soda
What exactly are yeasted pancakes?
Yeasted pancakes are a fairly regular type of pancakes, but instead of baking powder or baking soda, we will be using yeast to raise them.
Because of the nature of yeast, this will be a lot longer process as the yeast needs to work its magic and you will need to leave the pancake batter to rest for 30 – 45 minutes somewhere warm.
For this, you’ll be rewarded by deliciously light and fluffy pancakes which taste just sublime!
I’ve also noticed (and that’s just my stomach telling me that…) that they seem a lot easier to digest.
My guess is that because the flour has a longer time to soak up in the liquid (as you wait for the yeast to work) it makes the gluten in the flour to soften and that’s what makes it easier to digest and the pancakes much lighter than perhaps regular pancakes.
Can I use yeast instead of baking powder for pancakes?
Yes, absolutely! This is exactly what we are doing in this recipe. You can raise your pancakes with yeast instead of baking powder and your pancakes are going to taste as amazing as your regular pancakes (if not better!).
The main difference between regular pancakes (with baking powder) and yeasted pancakes is that they take longer (about 30 minutes or a little more). The yeast needs to be activated before you fry your pancakes. Although you will not knead this pancake dough, you will see that the volume will increase as you leave the pancake batter to proof.
Story of this recipe
This is my take on a traditional yeasted pancakes recipe which I originally discovered in an old cookery book written at the end of the 19th century.
If you fancy making the original recipe, please head over to my travel blog, where I’ve kept the recipe exactly as it was in the cookery book.
SUGAR FREE PANCAKES RECIPES
- Truly sugar free pancakes >>
- Blueberry (Sugar Free) Pancakes >>
- Almond & Flax Pancakes (Sugar Free) >>
My top tips on making this recipe successfully first time round
Don’t rush – make sure that you leave your yeasted pancakes batter to rest for long enough – at least 30-45 minutes similarly to if you are baking bread.
Keep the batter warm – make sure that your pancake batter is somewhere warm (but not hot), whether that’s a lightly warm oven, microwave (switched off), hot water tank cupboard or under your kitchen lights.
What makes this recipe work
- Leaving the pancake batter to prove for long enough makes the pancakes very light and easy to digest
- If you have the time, whipping the egg whites separately adds to the fluffiness of these yeasted pancakes
- Using a good quality vanilla essence, extract or a paste makes a real difference to the taste
- Adding a pinch of salt helps to sharpen the flavours and won’t make your pancakes taste bland
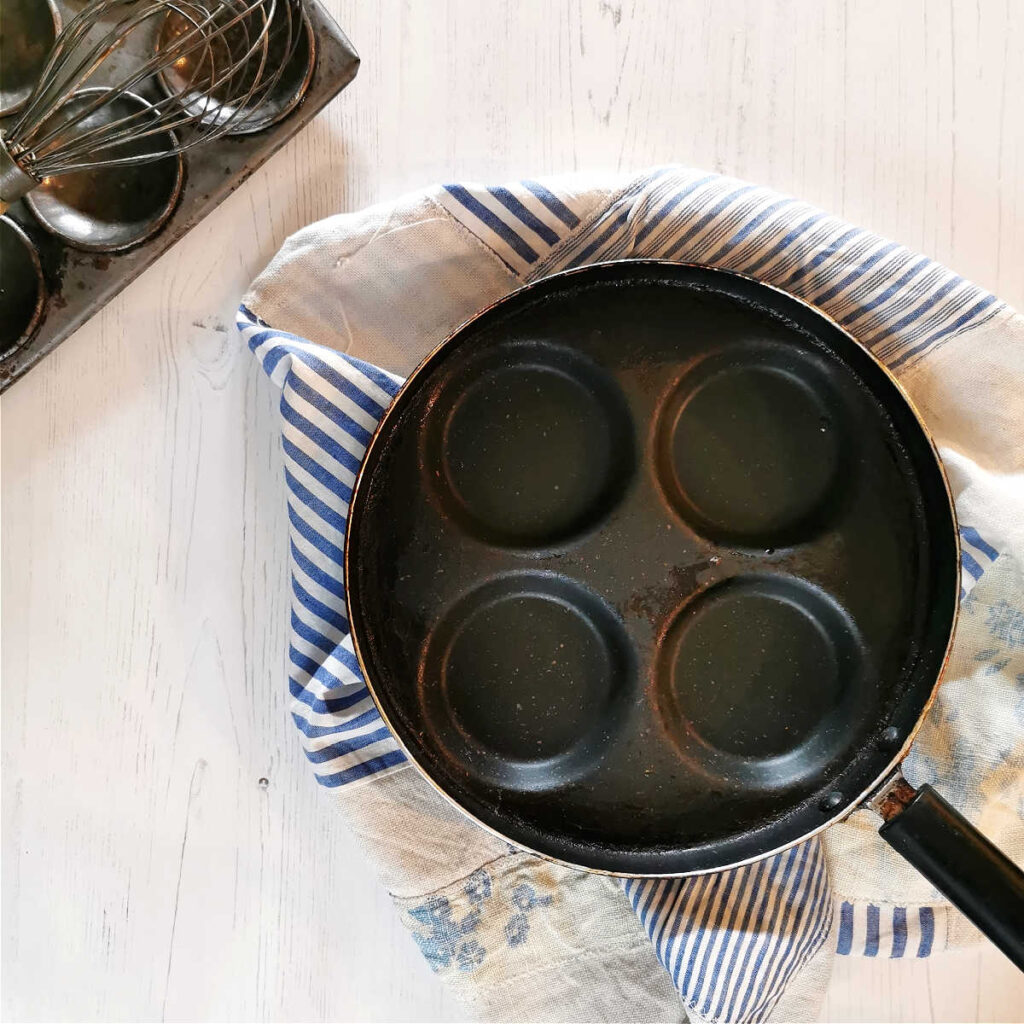
Any specialist equipment needed?
You don’t need specialist equipment to fry your pancakes, any large frying pan or a flat griddle will be fine to use.
Since I make pancakes quite often, I’ve treated myself to a special pancake frying pan which, I think makes a difference in how the pancakes rise and it also helps to keep the perfect cooking temperature for your pancakes.
The pancake pan has deeper cavities, which prevents the pancake batter from spreading out and makes them rise a bit higher. This also means that they are thicker and that makes them lighter.
I think having a specialist pancake pan is totally worth it, as it also helps me to portion the pancakes better into more even rounds.
Time saving tip
If you are very hungry in the morning and want quick pancakes ready in a few minutes, this recipe won’t work. Unfortunately, there is no quick tip I can offer here, other than keeping the pancake batter in a warm environment which can prove the batter in about 30 minutes (rather than 45 min).
What does, however, makes a difference, is to prepare the pancake batter the night before (or say 8 hrs before you want to serve your pancakes), place the ready batter (covered) into the fridge and let the batter to prove in the fridge overnight like if it was bread.
Because the pancake dough is much more liquid than regular bread, I would also recommend that you half the amount of yeast in the recipe from 1 teaspoon to 1/2 teaspoon, which will slow down the proving process even further. This is just in case you don’t catch your pancakes early enough and they overproof in the fridge overnight.
In the morning, let the pancake batter come to room temperature (if you have the time) and then start frying your pancakes.
Overall, I think that proving the pancake batter overnight in the fridge does save time because you don’t need to think about it in the morning or don’t need to get up that early to make your pancakes.
Pro tip
If you want to make these pancakes extra fluffy and light, whisk the egg whites separately from the rest of the recipe ingredients and fold them in towards the end (before you leave the pancake batter to rest).
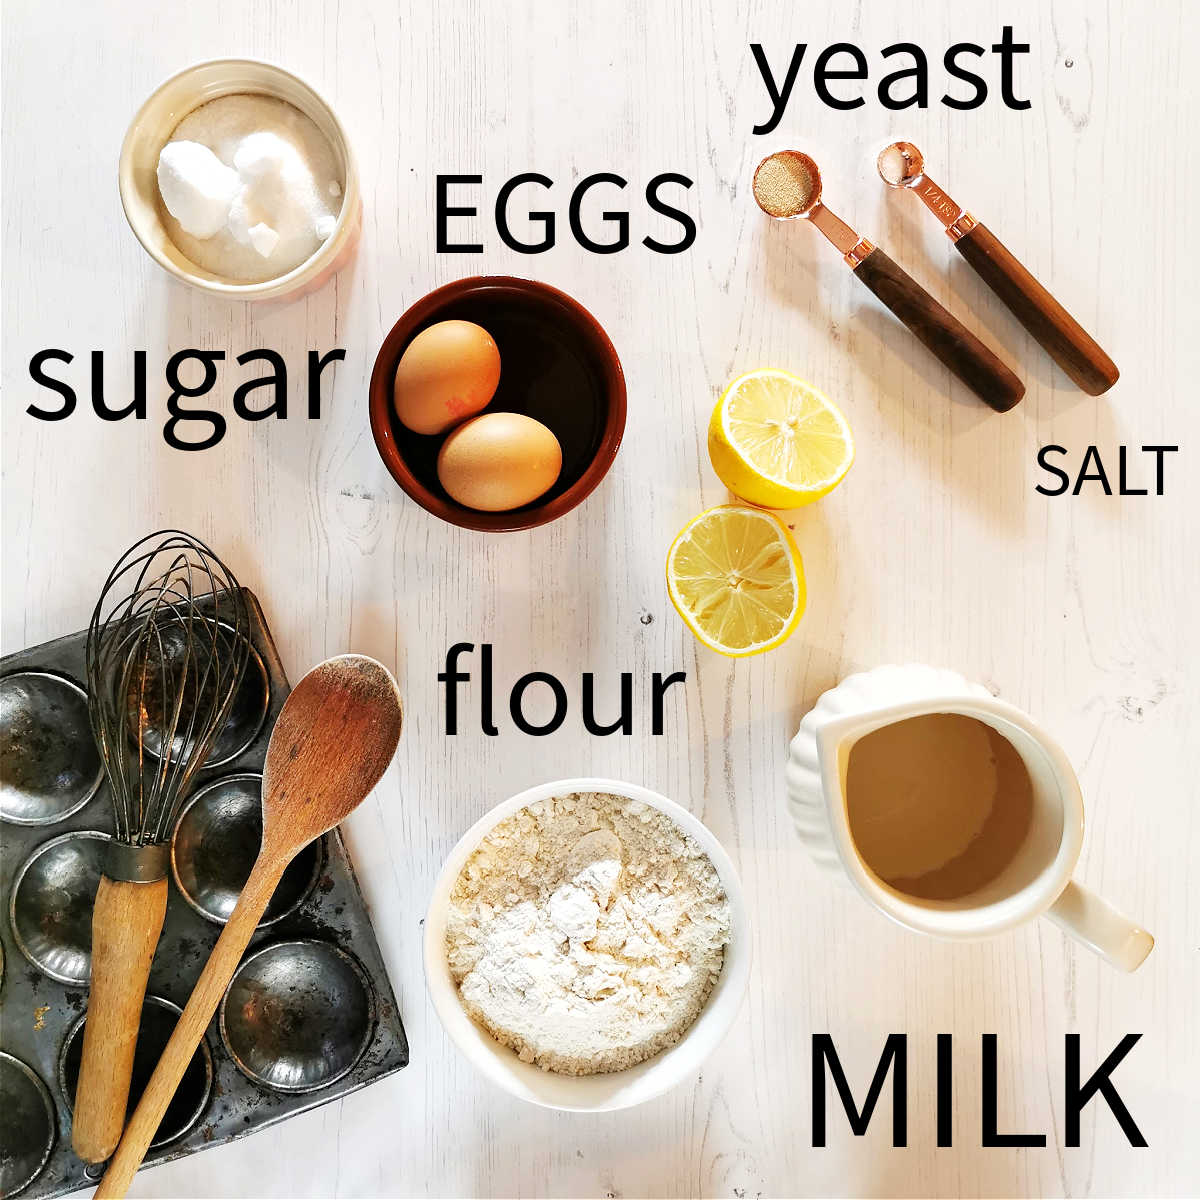
Ingredients & Possible Substitutions
Flour
I’ve used plain flour (cake flour) in this recipe, but you could use any low gluten type of fine flour or a mix of different flours.
Although this is a yeasted dough, I wouldn’t really use bread flour as this would make the pancakes tough and less light.
To keep the pancakes still nice, light and fluffy you could use 50% plain flour and 50% different flour, such as:
- Spelt Flour
- Buckwheat Flour
- Wholemeal Plain (Cake) Flour
Please don’t use self-raising flour for this recipe as we are going to use yeast as a raising agent and it would be just too much together.
Yeast
I’ve used dry active yeast for this recipe, but you could use fresh yeast if you have it. There is about 1 teaspoon of dry yeast, which is about 1/2 sachet of fast acting yeast or about 8-10 grams of fresh yeast.
Sugar
This recipe will work with any granulated type of sugar. I’ve used regular caster sugar, but you can change the flavour of the pancakes by using other types of sugars.
Darker sugars, such as light brown or dark brown sugar, molasses sugar, demerara sugar, coconut sugar or similar types of sugar will add colour and flavour to your pancakes.
If you want to use liquid sugars, such as honey, agave, golden syrup or golden sugar syrup substitutes or maple syrup, you might need to add a little less mill to compensate for the liquid sugar.
Salt
I always add a tiny pinch of salt to my pancake batter because it helps to bring all the flavours together. I use regular fine table or cooking salt.
Milk
The traditional recipe for yeasted pancakes have regular milk but you can use pretty much any type of milk with this recipe.
I usually use semi-skimmed milk, but whole milk would add extra creaminess if you wanted to. Lactose free or plant based milks are fine too – use the same amount as the recipe states.
- rice milk
- oat milk
- 50% water & 50% white yoghurt mix
- whole milk
- 50% cream & 50% water or milk
Vanilla essence
Don’t worry if you don’t have any vanilla essence or extract of a paste, but if you do have it, vanilla makes a lovely addition to the flavour of your pancakes. The better quality you have, the better taste.
Eggs
You’ll have two options with this recipe – either whisk the egg whites separately and then add them in or mix everything together. You could use any leftover egg whites from making other enriched sweet dough recipes.
Egg is very important for the success of this pancake recipe, so I wouldn’t be tempted to replace it for my Bisquick pancake egg substitution recipes, because it’s not going to work as well.
Optional flavours
These pancakes are pretty amazing as they are, but you can easily make them different if you cinnamon, mixed spice or other sweet spices, change the type of sugar, lemon or orange zest or swap regular milk for single cream or yoghurt.
Two ways of making yeasted pancakes
Option 1 – with separately whisked egg whites
The traditional way of preparing this recipe – whisk the egg whites first, then mix everything else in a separate bowl (including the egg yolks) and fold the egg whites in at the end.
Make the pancake batter extra light and fluffy and it’s worth doing if you have the time, want to mess around with extra washing up, have an electric whisk ready and are OK to create a bit of noise!
Option 2 – all in one method
A quick and easy method of mixing everything together – no need for an electric whisk and works just as fine as method 1 and it’s perfect for a midnight snack!
How to make light and fluffy yeast pancakes with whipped egg whites
Separate the eggs into egg white and egg yolks. This is an extra step to make your pancakes light and fluffy. You can just add the eggs in as they are if you don’t have the time to whisk them.
Whisk the egg whites into hard peaks using an electric whisk or using a mixer. (or skip this step if adding eggs in whole)
Measure and mix all the dry ingredients – plain flour, yeast, a pinch of salt and sugar.
Add most of the milk, but keep some just in case the batter is too runny. (the final amount depends on what type of flour and milk you are using, so it’s best to add milk gradually).
Add the egg yolks (or the whole eggs if not using egg whites separately) and vanilla essence and mix in (you can carry on using the electric whisk for this).
You should have a slightly thicker batter (if not add more milk).
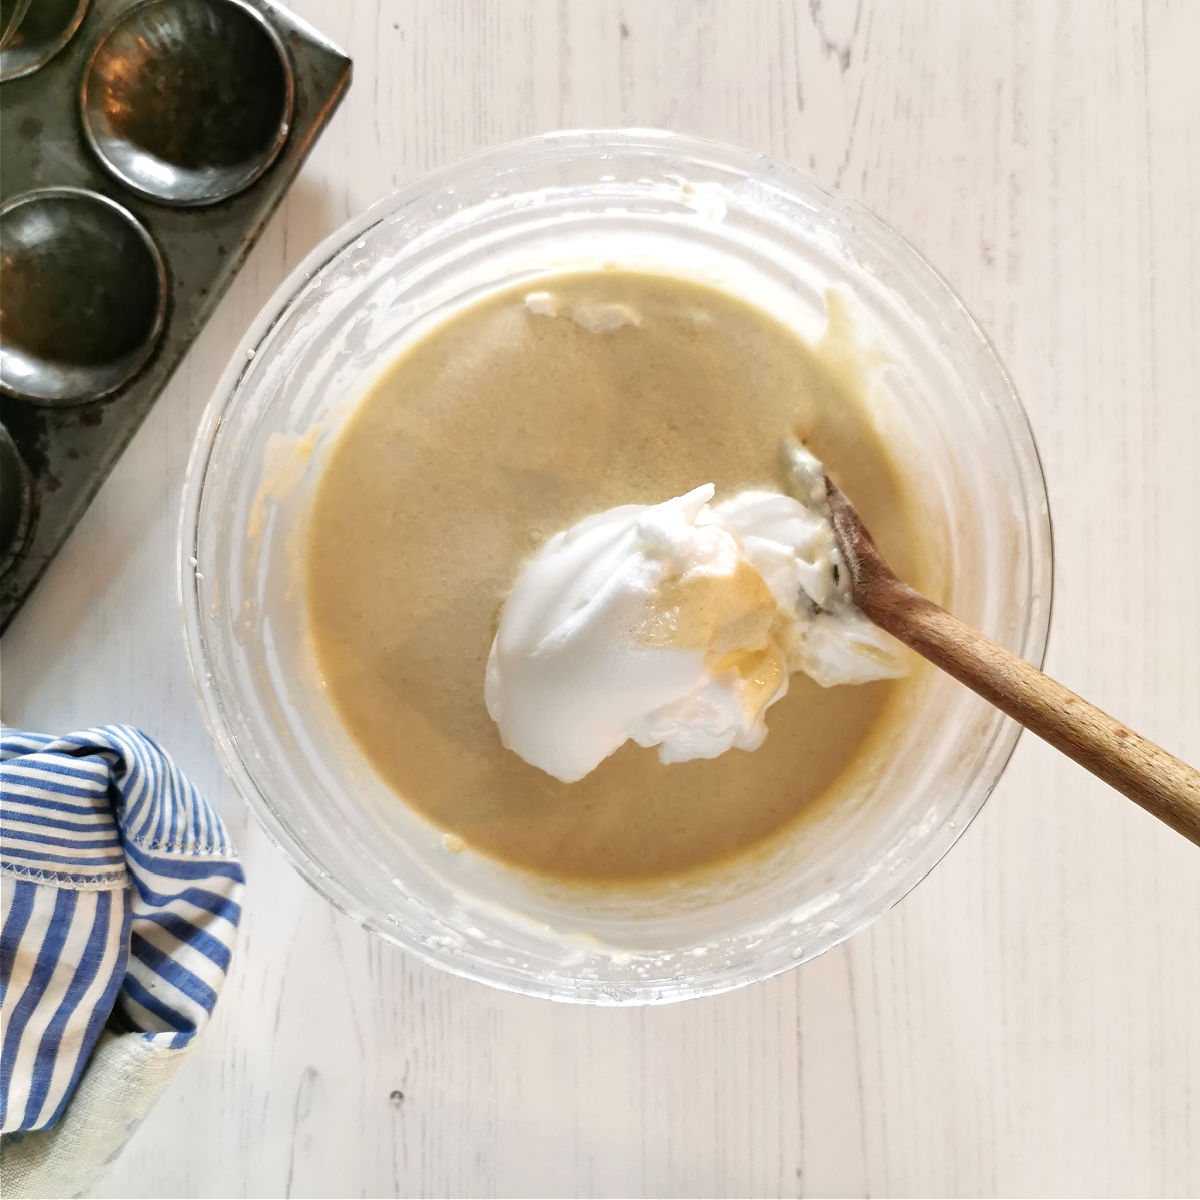
Once you are happy with the consistency of your pancake batter, fold in the egg whites gently. (If using the eggs whole skip this step)
Cover with a tea towel and leave somewhere warm (but not hot) to prove for at least 30 minutes or until the pancake batter roughly doubles in size (or close enough).
Heat your pancake pan on medium heat, add some oil to prevent pancakes from sticking and test the first pancake. Taste it and add more sugar, salt or anything else you think your pancake batter needs (more milk if it feels too thick).
Fry the rest of the pancakes on both sides until they are golden brown.
How else you can make this recipe? Variation on this recipe, Allergies, dietary requirements
This yeasted pancakes recipe (as it is) is not suitable for a gluten or dairy free diet. It’s also not suitable for vegetarians or vegans, but here is how you can make it so:
Gluten-Free Version
Swap the plain flour for gluten-free plain flour mix and either add 1/2 teaspoon of xantham gum or use it as it is if your gluten-free flour already has a xantham gum mixed in.
Dairy Free Version
Swap the regular milk for your favourite plant based milk, bearing in mind that something like coconut milk will affect the flavour of the pancakes. I usually use rice or oat milk to keep the flavour the same.
Vegan Version
Swap the eggs with about 1/3 of vegetable or sunflower oil. This will make the pancakes still light and moist. I normally don’t use butter to make this pancake recipe, but if you wanted to include vegan butter substitute for pancakes you certainly can to make the pancakes extra morish.
GLUTEN FREE PANCAKES RECIPES
Serving size
This recipe makes 24 pancakes (about 6-7 cm in diameter) on the standard pancake frying pan (see above).
Can I scale up or down this recipe?
Yes, absolutely – you are welcome to half the recipe by halving all the ingredients. The amount of time you will need to prove the batter might not necessarily be halved in time, but it will be a bit quicker if you keep the batter somewhere warm enough.
This recipe is also perfect to double or triple. Again double or triple all the recipe ingredients and leave to rise for the same time as the recipe states. Because you’ve added more yeast the proving time should remain the same, providing that, again, you keep your dough in a warm (not hot) environment.
How to serve this recipe
You know what to do here! But my best advice is to serve the pancakes hot or at least warm – they taste absolutely divine when they are straight from the frying pan!
You can always warm them up in the microwave again (before you add your toppings, yoghurt, sauces or fruit).
Toppings & Sauces Ideas
Enjoy topped with different sweet sauces, yoghurt, peanut butter, nutella, cream, jam or homemade marmalade.
- Pear Simple Syrup >>
- Banana & Honey Curd >>
- Grape Jam (without pectin) >>
- Pumpkin Butter >>
- Apple & Cinnamon Sauce >>
- Orange & Lime Marmalade >>
Troubleshooting tips
This is a pretty straightforward recipe, so you shouldn’t come across many problems.
The only thing here to remember is that the proving time might be different for different pancake batters, depending on how warm/cold your kitchen is (or the place you leave your pancake batter to rise).
This recipe and me
I make this recipe regularly as I like the taste of yeasted pancakes and the lightness of the pancake batter.
Can this recipe be made in advance?
Yes, you can make your yeasted pancakes in advance and then either keep them in the fridge in an airtight container (perhaps stored with baking parchment in between each pancake, so that they don’t stick to each other) for 2-3 days.
I would always heat them up in the microwave or oven (180C for 5-10 minutes – depending on the quantity) and serve them warm.
If you make far too many or you can’t finish them in a few days, I’d recommend freezing your pancakes. Freeze them straight away, leaving them on a flat tray (placed in the freezer) and then stack them up with baking or greaseproof paper in between. That way you can easily take them out one by one and have them for breakfast any time you want.
How to store pancakes if you have any leftovers
As if! But if you do have some leftovers, cover your pancakes with another plate (or place them into an airtight container) and keep them in the fridge for 1-2 days or freeze them on the same day. I’ve never had them in the freezer for more than 1-3 months, but I’m sure they will probably last a bit longer if needed.
How to re-heat yeasted pancakes
It’s very easy to re-heat pancakes. Simply microwave them for 30 seconds or so. Check after 30 sec and add more time if needed. You can keep them stacked in a 3-4 to prevent them from overheating or burning.
You can also use the oven switched on about 180C (350F) for 5-10 minutes – depending on the quantity. If you are laying them out individually, make sure your tray goes into an already warm oven so that you don’t dry your pancakes unnecessarily.

Yeast Pancakes with whipped egg white
Equipment
- pancake pan with 4 cavities or a regular frying pan or griddle
Ingredients
- 300 grams plain flour
- 1 teaspoon dry active yeast
- 4-6 tablespoons caster sugar sugar according to your taste
- 1 large pinch fine salt
- 300-350 ml milk or plant based milk
- 1 teaspoon vanilla essence
- 2 eggs separated if you want to whisk the egg whites separately
Instructions
- Separate the eggs into egg white and egg yolks. This is an extra step to make your pancakes light and fluffy. You can just add the eggs in as they are if you don’t have the time to whisk them.
- Whisk the egg whites into hard peaks using electric whisk or using a mixer. (or skip this step if adding eggs in whole)
- Measure and mix all the dry ingredients – plain flour, yeast, pinch of salt and sugar.
- Add most of the milk, but keep some just in case the batter is too runny. (the final amount depends on what type of flour and milk you are using, so it’s best to add milk gradually).
- Add the egg yolks (or the whole eggs if not using egg whites separately) and vanilla essence and mix in (you can carry on using the electric whisk for this).
- You should have a slightly thicker batter (if not add more milk).
- Once you are happy with the consistency of your pancake batter, fold in the egg whites gently. (If using the eggs whole skip this step)
- Cover with a teatowel and leave somewhere warm (but not hot) to prove for at least 30 minutes or until the pancake batter roughly doubles in size (or close enough).
- Heat your pancake pan on medium heat and test the first pancake. Taste it and add more sugar, salt or anything else you think your pancake batter needs (more milk if it feels too thick).
- Fry the rest of the pancakes on both sides until they are golden brown.
- Enjoy topped with different sweet sauces, yoghurt, peanut butter, nutella, cream, jam or marmalade.
Nutrition
This blog post was originally written on 18 January 2022 and last updated on 26 October 2022


Leave a Reply