The ultimate guide to bread dough spreading and practical tips on how to fix it and prevent it from happening again when you are baking your bread at home.
What do I do when my bread dough is spreading and losing its shape when it's proving? This is something I get asked quite often during my bread baking courses.
It can be very discouraging to follow a recipe and then still end up with bread that might taste great, but it's not looking the way we thought it should and instead of lovely proud bread, we have something resembling a flat bread!
Fortunately, there are plenty of ways you can prevent your bread dough from spreading it's happening now and I also have a few tips for you to make sure it' doesn't happen next time.
PIN IT & KEEP THIS FOR LATER!

BREAD RECIPES
Why does my bread dough spread out?
This is usually happens because the bread is over-fermented.
If you leave your bread to prove for too long, the gluten structure that you've created will start to slowly break down and the bread will lose it's structure.
It will be more difficult to shape and it won't hold its round shape when you bake it. The yeast inside your bread needs to have enough strength to do its final rising in the oven (the first 5-10 minutes).
If the regular bread dough or sourdough bread is overproved, the yeast is already spent (inactive) and your bread won't rise in the oven anymore.

What to do when your bread dough is already spreading and how to salvage what you already have
Mix the overproven dough with newly made bread mix with fresh flour and fresh (or fast acting yeast)
This is a fairly easy fix, but it means that you need to spend more time to make and bake your bread and you also need fresh ingredients (flour, water, yeast etc.).
Simply mix your favourite bread recipe again and add 2x the amount of yeast that you normally do.
For most bread recipes that start with 500 grams of flour, this would be 1 1/2 teaspoon ( which is about 5-7 grams or one sachet of fast acting yeast, which usually is 7 grams), so doubling the amount would be 3 teaspoons or 2 sachets of fast acting yeast.
Mix & knead the doubled recipe together (mixer is quite useful for this, but hand kneading is fine too).
Leave to prove, shape etc as usual and make sure you don't leave the dough to overprove again. If you want to slow down the process of proving, use a fridge for slow proving overnight or for up to 8 hrs.
If you are very careful you can also use oven for proving your bread, but make sure that you set a timer and keep your oven temperature very low for this.
Once baked, leave to cool down and freeze some to save for later.
BREAD RECIPES
Shape your bread dough again and even tighter than you normally do
If your bread is only slightly overproven, you can leave it to prove again.
Most yeast (even the modern fast acting yeast) is fine for up to 4 times rising.
You will need to deflate your dough and shape it much tighter than before to keep the structure of the loaf.
Make sure that you don't leave the dough to prove for too long - you only want the dough to be slightly less than a double size before it goes to the oven.
Make sure that your own is pre-heated
To make sure that your bread rises nicely in it's last stages of rising, you need to make sure that your oven is pre-heated to the temperature you need for your bread. This is quite important, especially if you are trying to save oveproofed bread dough.
If you don't pre-heat your oven, it might take up to 10-15 minutes for the oven to reach the desired temperature and by then the top bread dough layer has dried and practically prevents the yeast to rise the bread any further.
Bake your bread at high temperature for the first 5 minutes
Make sure that your oven is at the right temperature before you start to bake your bread to give the bread extra rise.
The first 5 minutes are very important, as the yeast is still rising the bread and if the oven temperature is high it gives the bread (even slightly deflated or flattened) much higher rise, than if you bake your bread at the same temperature.
The ideal oven temperature (for domestic ovens) is 250 Celsius (or 480 Farenheight) for the first 5-10 minutes (this depends on the size of your bread - rolls/small breads would be 5 minutes, regular or large size breads are 10 minutes).
After the initial time turn down the temperature to 180-220 Celsius (or 380 - 450 Farenheight) depending on how much the bread is browning.
Carry on baking until the bread is done.
BREAD RECIPES
- Traditional Beer Bread >>
- Kentish Huffkings (Soft white flour rolls) >>
- Dinner Biscuits (Easy to make scones) >>

Use a sandwich loaf bread tin to prove your dough
If you don't have the time to mix another dough or have more flour and you just need to use the bread mixture you've made, use something that will support the bread as it proves and bakes like a traditional Pulman's loaf tin.
You'll end up with sandwich loaf, which is better than flat dry bread. Even if the bread dough is slightly over fermented the tin will hold it.
Because the dough might be quite sticky, grease or line your bread tin to make sure that the bread won't stick to the tin and you can easily take it out when baked.
Make the bread dough into smaller breads, rolls, focaccia, pizza or bread sticks
This might not be something, you intended when you started to make today's batch of your bread, but sometimes changing your plan is better than completely failing it.
If your dough is over proved and the bread dough has spread too much, you can also make it into smaller types of bread, such as smaller loaves, rolls, bread sticks, focaccia or pizza.
The yeast in the dough will just about cope with holding up a smaller roll when it won't be able to hold up a standard bread loaf.
Deflate the spread dough first, divide into several pieces (from standard bread dough with 500 grams of bread flour, I usually get 12 standard rolls) and roll the pieces tightly into rolls or smaller loaves.
The runnier or flatter the dough originally was the smaller or flatter types of bread you need to choose to make it into. For very flabby bread dough - focaccia, flatbreads or pizza is the best solution.
Let the bread dough to rise for the second time, but keep an eye on it to make sure it doesn't overproof again. Smaller pieces of bread dough prove considerably quicker than large ones - usually, this is only 15-20 minutes maximum.
PIZZA RECIPES
- Spelt Pizza (low gluten) >>
- Healthy Pepperoni Pizza >>
- Pepperoni & Mushroom Pizza (with lupin flour) >>
- Buckwheat Pizza (Gluten-Free) >>
Keep the bread dough in the fridge (or separate into 150 g chunks and freeze) and add it to any new bread you make
The over-proven bread might not have its gluten structure anymore, but it has a well-developed flavour.
You can easily use the bread dough for baking other breads (or even for pancakes and other simple cakes). You can use any type of recipes that also use a discarded sourdough starter.
If you keep your 'spoiled' bread dough in the fridge, it will be fine for a few weeks. Keep it in the air tight container (I usually use plastic) and use it up within 2-3 weeks.
Alternatively (if you don't bake that often), just portion the bread dough into 150-200 grams chunks (large rolls size) and freeze it separately by wrapping each piece in freezer bag. Freeze the individually wrapped bags first on their own and then put them all in one container (plastic tub with a lid). This way, they won't stick together and you can take out only what you need.
When you are ready to use the overproved frozen bread dough, take it out, defrost it first and add it to your recipe (as if it was a discarded sourdough starter). Because 150 grams is quite a small portion of bread dough, you wont' need to change the recipe in any way.
RECIPES

How to stop your bread from spreading (for the next time)
Shape the bread dough correctly and tightly
This is a common problem for most bread bakers when they are just starting out.
Your bread dough needs to be tightly shaped to achieve a high rise. The more water and the more over-proven your bread is, the more tightly you need to shape it to prevent it from spreading out.
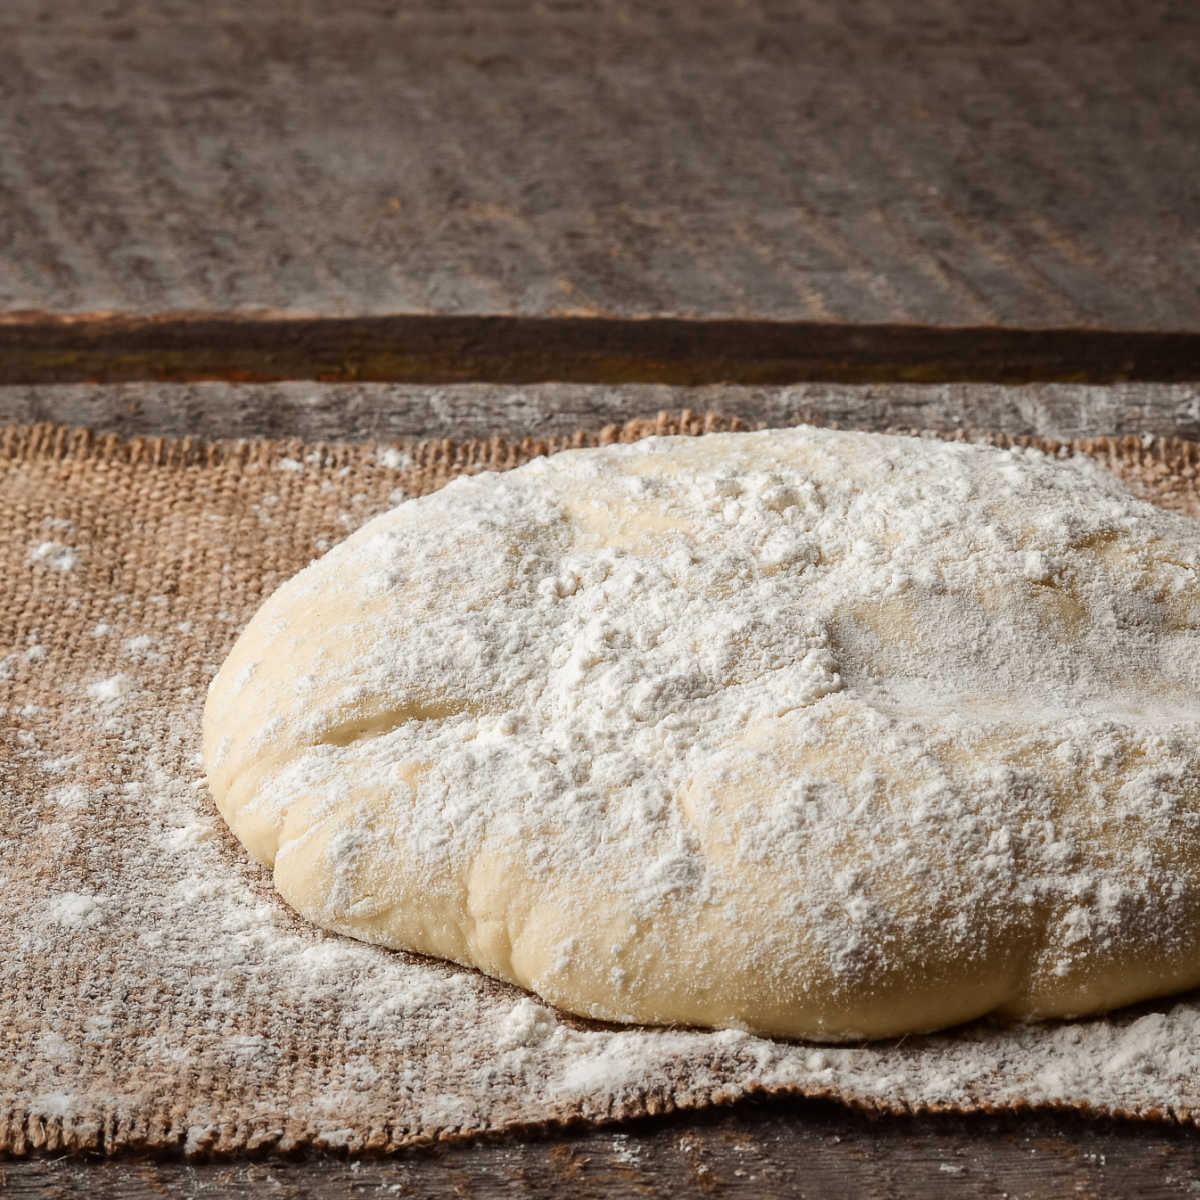
The best way to shape your bread is to gently deflate it first (when you take it out of the proving bowl). Deflate it with your fingers (as shown in the first picture) and then roll it like a sausage, tightening and gently stretching the dough at the same time.
Do this twice, making sure that you work with the seam from the first rolling up. The photos are taken from the second tightening so that you can see the seam from the first tightening round (first photo).
When you roll the bread for the second time, you should get something like in the third photo - a chunky rolled sausage. If you are using a sandwich tin, leave it like this and place it in the tin. Or you can just use a long banneton for your proving.
Pinch the long sides down (or under the dough) and tighten on the side (with the pinched ends underneath). Tighten until you are happy with the shape and you have a round dough.
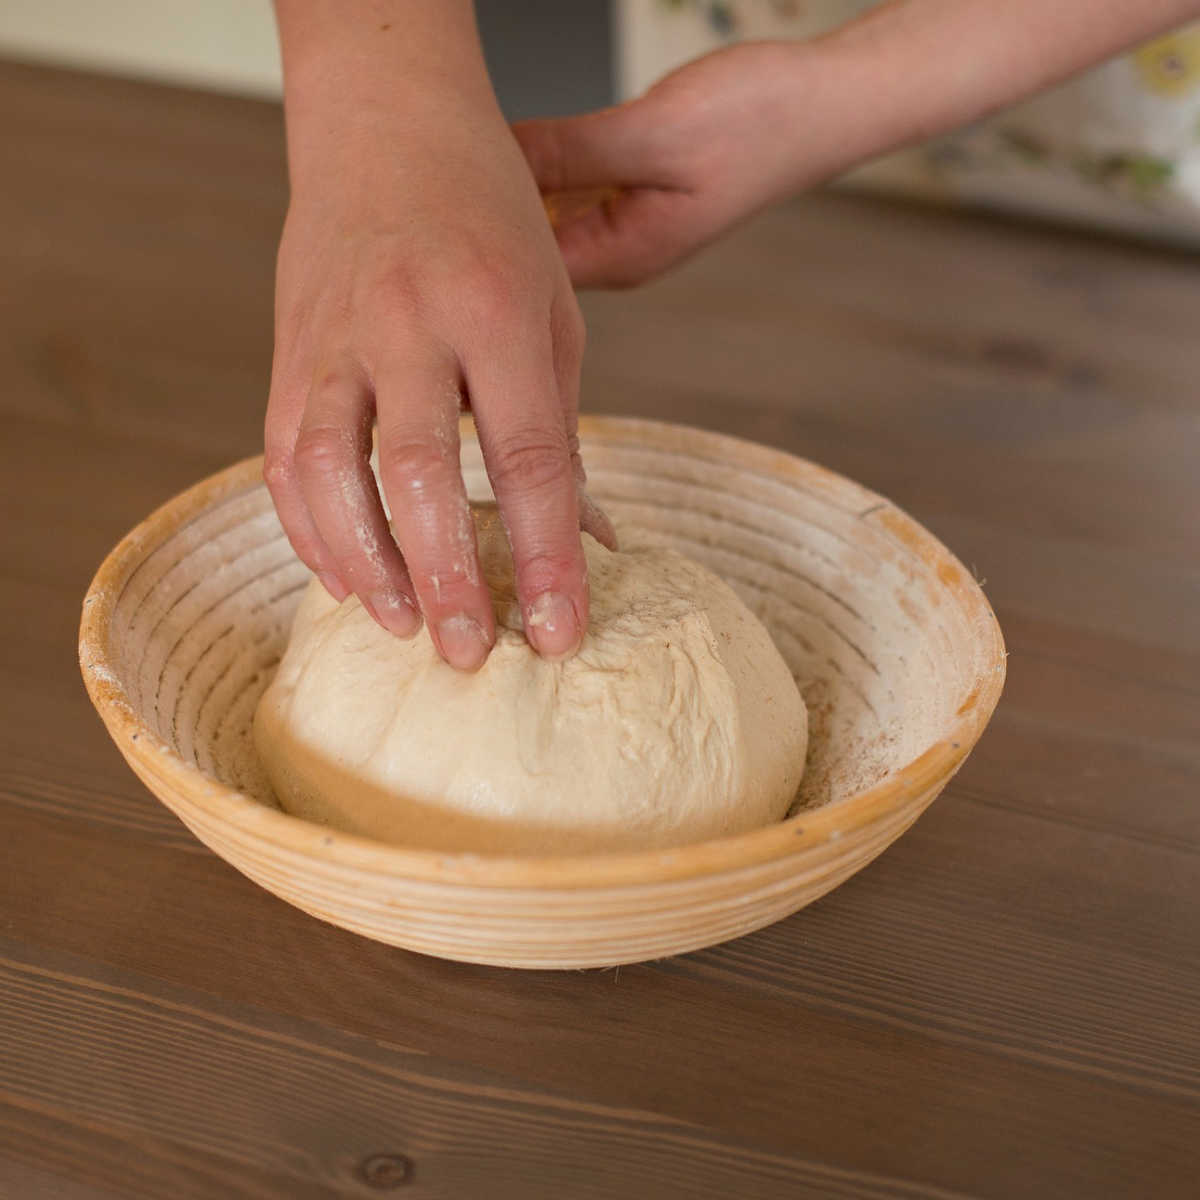
Place it in the round banneton, making sure the dough is upside down (with the pinched long sides on the top) and make sure that you add some flour to ensure that your bread dough or sourdough won't stick to your banetton. Leave it to prove again.
BREAD RECIPES
Use banneton for the final rise
To achieve a perfect rise, it's best to use a bread banneton (or something similar) for the final rise and proving your dough. You still need to shape your bread tightly first, but the banneton helps to hold the bread dough structure as it's rising.
If you are using a traditional banneton made from natural cane, the outer layer of your bread is going to dry out a little as the bread breathes through the gaps in the cane structure of the banneton.
This is good thing, because this is how you get your lovely crust on the bread, but as the outer layer hardens a little, it helps to keep the bread structure as you take it out and put it on the tray to bake.
Be very careful when taking your bread from the banneton on to the baking tray
I've seen this many times - people are impatient and want to turn the bread out quickly on to the baking tray and what usually happens is that they turn the bread banneton upside down and let the dough drop down onto the tray.
Well, you can just imagine what happens! No matter how brilliantly you've shaped your loaf, you'll deflate it by casually dropping it down on the tray!
What you need to do is to be very gentle with your dough. Place the tray on top of your banneton (with your dough inside) and then slowly and carefully turn the whole thing the right way up.
You will need to hold both the tray and the banneton together. Then all you need to do is to carefully lift the bread banneton and there you are - one perfect round bread!
Use less water than your recipe tells you
If you are not confident enough with your bread dough shaping or you are just starting out with bread baking, use slightly less water than the recipe tells you.
Next time when you are making your bread dough use 20-30 ml less water to make your dough firmer, which in turn will make it easier to shape keep it's shape as it proofs.
Don't be tempted to use significantly less water as the water is important for the gluten development and for making the bread dough soft.
Make sure you don't over prove your bread
Most bread baking recipes mention that you need to leave your bread to prove for a particular time or until it doubles in volume.
If you are just starting out to bake your bread at home, this could be very difficult to judge. The proving time changes with the type of flour you use, the temperature of your kitchen, the amount of yeast you use or other ingredients that are in the bread.
For example enriched type of dough (such as for my Cinnamon Star Bread Recipe) can take up to twice as much time to prove than regular bread dough, because it has extra butter, eggs, milk and sugar. All these ingredients are weighing the dough down and even though the recipe has twice as much yeast as regular bread the proving time is about double to the regular bread dough.
The best advice I can give you here, is to take a picture of your bread on your phone before you start to prove it (or mark the level with a pencil on the bread bowl) and then check every 30 minutes or so so gauge when the dough doubles in size.
This is for the first dough proving.
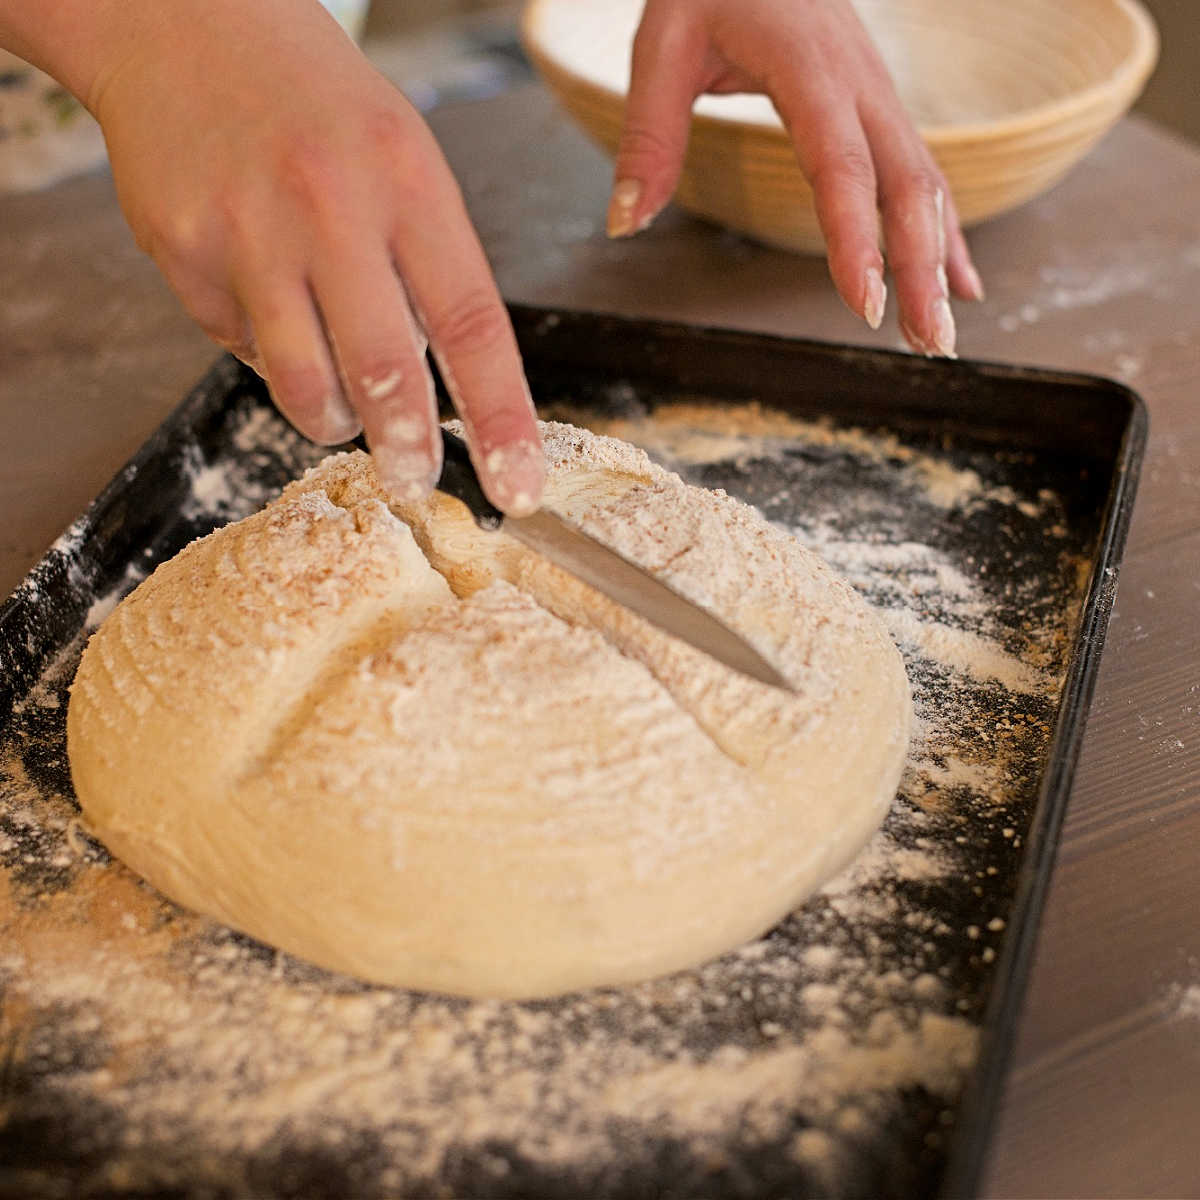
The second proving (if you are doing that) needs to be slightly under the double size. This is because the yeast needs to grow in the oven and if you overproof your bread the yeast won't have the strength to rise and you might deflate your bread if you are used to scoring it with knife on the top.
Use the right type of flour
If you are still finding difficult to keep your bread in shape when proving, you might like to know that the type of flour you use also impacts on the strength of the bread dough.
This is all to do with gluten in the flour. The stronger gluten, the stronger flour and the more sturdy bread dough and higher rise on the bread.
Examples of flour with high amounts of gluten
White or Brown Very Strong Canadian Bread Flour - this type of flour has on average 15% gluten, which is very high
Examples of regular strength gluten flours
White, brown or wholemeal bread flour - 12-14% gluten
All purpose (self-raising), cake flour - 7-9% gluten
Examples of lower gluten flours
Spelt
Rye
Examples of gluten-free flours
- Buckwheat flour
- Lupin Flour
- Rice Flour
- Maze Flour
- Cornflour
- Tapioca Flour
- Soya Flour
- Potato Flour
This blog post was originally written on 17 December 2021 and last updated on 12 February 2023


Leave a Reply